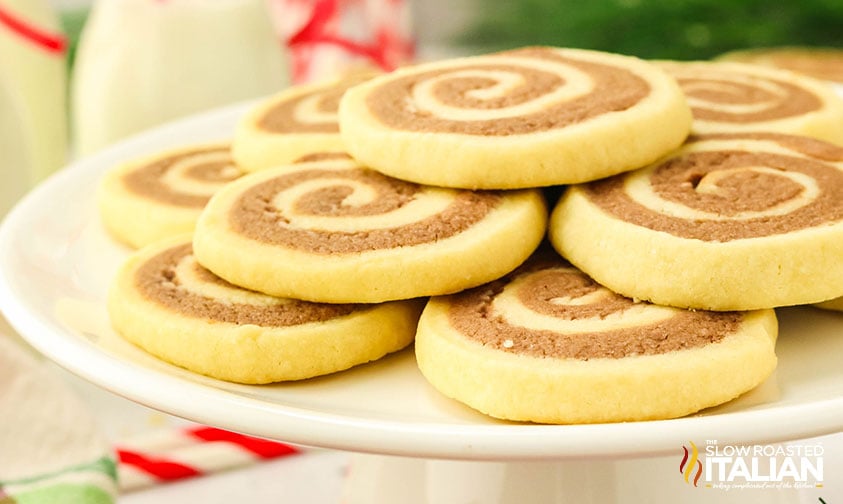
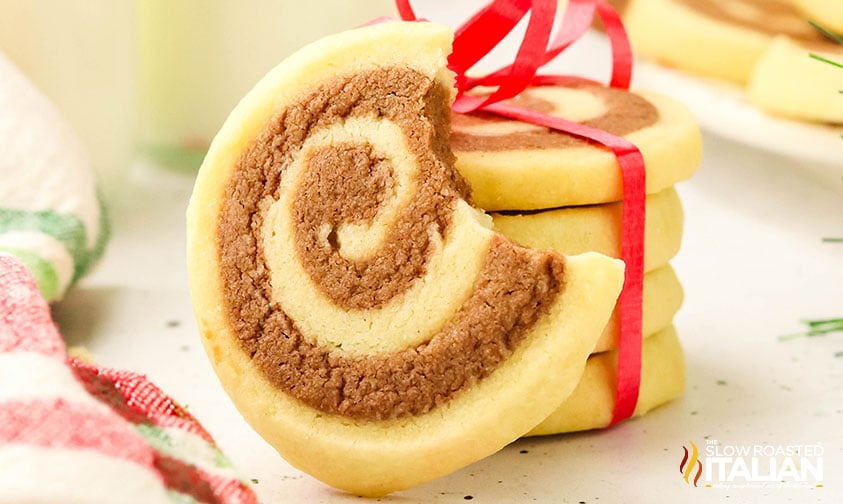
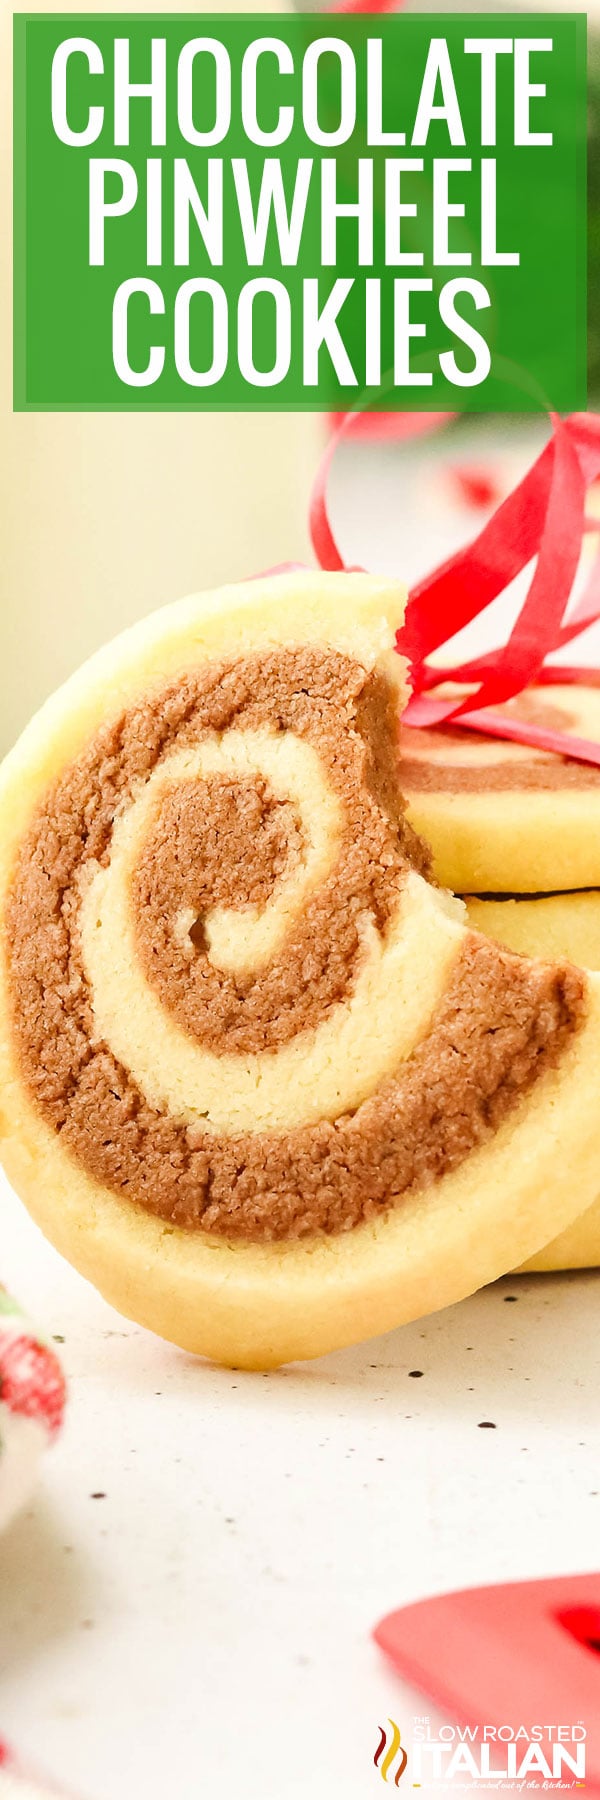
Chocolate Pinwheel Cookies
Chocolate Pinwheel Cookies combine buttery vanilla dough and rich chocolate swirls for a treat that looks bakery-fancy but tastes like pure nostalgia. The crisp edges and soft centers make pinwheel chocolate cookies the perfect mix of texture and flavor. This easy slice-and-bake recipe rolls up in minutes, chills for clean slices, and bakes into picture-perfect spirals… tested and perfected in the TSRI kitchen for melt-in-your-mouth results every time!

WHY YOU’LL LOVE PINWHEEL CHOCOLATE COOKIES
- Sweet Tooth Satisfaction: Buttery flavor with a hint of cocoa.
- Bakery Look: Perfect swirls make every cookie look handcrafted and gift-worthy.
- Slice and Bake: No messy cut-outs or complicated steps.
- Great for Any Occasion: Holiday trays, cookie exchanges, or make-ahead baking.
- Freezer-Friendly Dough: Instant homemade cookies anytime.
Chocolate Pinwheel Cookies
I’ve had spiral treats for the spring and winter holidays on the site for years, but nothing beats a good ol’ fashioned chocolate pinwheel cookies recipe.
The balance between buttery and chocolate goodness is just right, and they aren’t so sweet that you’ll overdo it.
Because trust me… you’ll find yourself sneaking “just one more” before they’ve even had the chance to cool.
Make a double batch for sharing, especially as neighbor gifts or at treat swaps. I’ll usually roll up a few dough logs at once and toss them in the freezer for last-minute occasions.
These are so much better than slice-and-bake dough from the store!
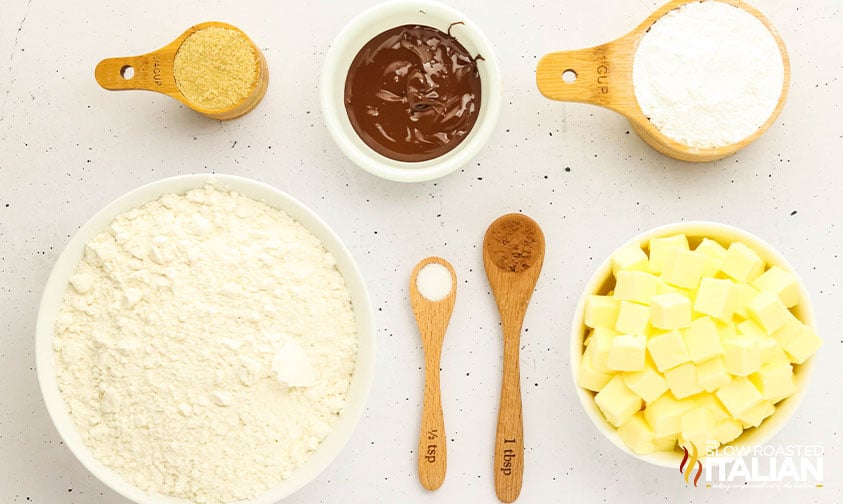
INGREDIENT NOTES
- Unsalted Butter: Softened butter gives these pinwheel chocolate cookies a delicate crumb and balanced salt level. With such a simple dough, use high-quality butter for the best flavor.
- Powdered & Brown Sugars: This combo adds sweetness and subtle caramel notes. Light brown sugar keeps the dough tender and the final bite tender.
- All-Purpose Flour: Too much will make the dough dry, so measure carefully by spooning and leveling.
- Semi-Sweet Chocolate Chips: Melt before mixing for a smooth chocolate layer. Use real chocolate, not candy melts. Chocolate chunks or a chopped-up chocolate bar work too.
- Unsweetened Cocoa Powder: Boosts the chocolate dough’s depth and color. Natural cocoa works best here.
- Kosher Salt: Balances sweetness and highlights the butter flavor.
VARIATIONS
Peppermint Swirl: Add ½ teaspoon peppermint extract to the chocolate dough.
Espresso Kick: Mix 1 teaspoon instant espresso powder with the melted chocolate.
Colorful Twist: Add a couple drops of gel coloring to the plain dough.
Gluten-Free Version: Substitute a 1-to-1 gluten-free flour blend. The dough may need an extra minute of chill time.
Holiday Edges: Roll chilled dough log in colored sanding sugar before slicing.
Double Chocolate: Spread a thin layer of melted chocolate between the layers before rolling.
SERVING SUGGESTIONS
- Pair with rich Italian hot chocolate or a peppermint mocha for a cozy dessert night.
- Add a scoop of ice cream between two chocolate pinwheel cookies for a sandwiched dessert.
- Stack on a tray with classic sugar cookies or eggnog cookies for a festive assortment.
- Package in cellophane bags tied with ribbon for edible holiday gifts.
CHOCOLATE PINWHEEL COOKIES RECIPE FAQ
Yes, without question. Rolling is so much easier (no need for extra flour!) when the dough is between two pieces of parchment. Cracks are less likely, and it’s easier to see if the thickness is even.
Parchment also prevents the cookies from spreading and flattening, plus it keeps the bottoms golden instead of overbrowned.
Absolutely. Because it gives a richer, slightly less sweet flavor, it’s often better for adult palates.
The dough may be too cold or rolled too loosely. Re-roll if needed and chill again to set, then let it rest for 5 minutes at room temperature before slicing.
Yes! Once rolled, the dough log can be wrapped and refrigerated for up to 2 days. It can also be frozen for up to 3 months if you want to get a jump on holiday baking. Just thaw, slice, and bake!
I’ve baked this chocolate pinwheels cookies recipe dozens of times, and every swirl reminds me why precision matters.
Softened butter whips with sugar to trap air, while melted chocolate creates the distinct two-tone spiral.
Chilling firms the fats so the cookies hold shape, then those same fats melt just enough in the oven for that crisp-edge, soft-center perfection.
DONNA’S PRO TIPS
- Measure flour correctly. Spoon and level to avoid dense dough.
- Chill twice. A short chill after mixing and another before slicing keeps spirals clean.
- Roll evenly. Work between parchment for uniform thickness and fewer cracks.
- Use a sharp knife. A long, thin blade prevents squished layers.
- Rotate your pan. Mid-bake rotation ensures even coloring from edge to center.
TOOLS NEEDED
- Stand Mixer: For creaming butter and sugars evenly.
- Rolling Pin: Essential for achieving thin, even dough sheets.
- Parchment Paper: Prevents sticking and makes rolling easier.
- Sharp Chef’s Knife: Cuts perfect rounds without tearing layers.
- Wire Rack: Cools chocolate pinwheel cookies quickly and keeps bottoms crisp.
Enjoy!
With love, from our simple kitchen to yours.
Don’t miss a thing! Follow us on
Facebook| X | Pinterest| Instagram

Chocolate Pinwheel Cookies
Ingredients
- 2 cups unsalted butter, softened, (4 sticks)
- 1 cup powdered sugar
- 1/4 cup packed light brown sugar
- 1/2 teaspoon kosher salt
- 4 cups all-purpose flour
- 1/2 cup semi-sweet chocolate chips, (3 ounces), melted
- 1 tablespoon unsweetened cocoa powder
Instructions
- PREPARE PAN: Line a large cookie sheet (18×13 inches) with parchment paper.
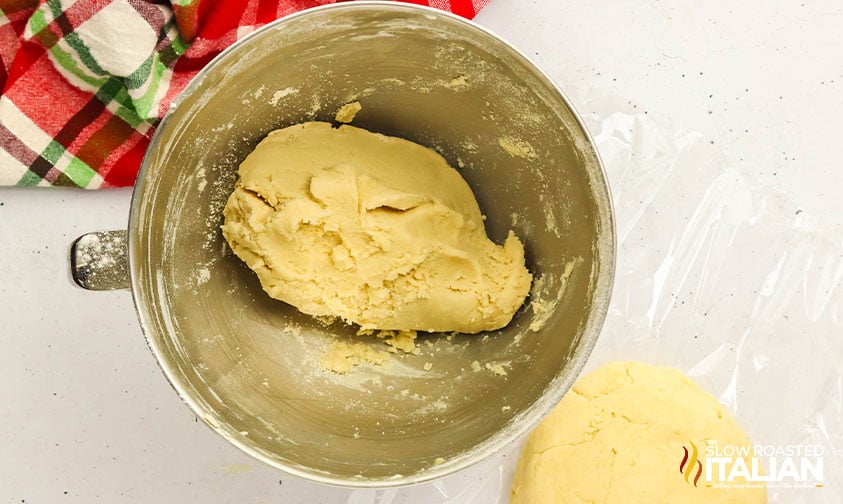
- MAKE BASE DOUGH: In a stand mixer fitted with the whisk attachment, beat 2 cups unsalted butter, softened, 1 cup powdered sugar, 1/4 cup packed light brown sugar, and 1/2 teaspoon kosher salt on high speed until smooth and slightly fluffy, about 2 minutes.
- ADD FLOUR: With the mixer on low speed, add the 4 cups all-purpose flour gradually. Mix just until a soft dough forms and pulls from the sides of the bowl.
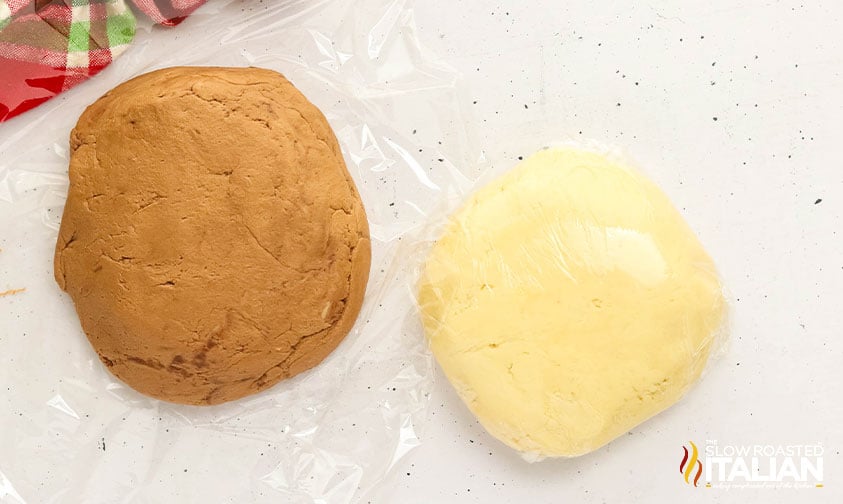
- DIVIDE DOUGH: Divide the dough in half (about 20 ounces each). Set aside one half and leave the other in the mixer bowl.
- MAKE CHOCOLATE DOUGH: Add the melted 1/2 cup semi-sweet chocolate chips and 1 tablespoon unsweetened cocoa powder to the dough in the bowl. Beat until it is evenly combined and smooth.
- CHILL DOUGH: Wrap both dough halves tightly in plastic wrap. Chill in the refrigerator for 10 minutes.
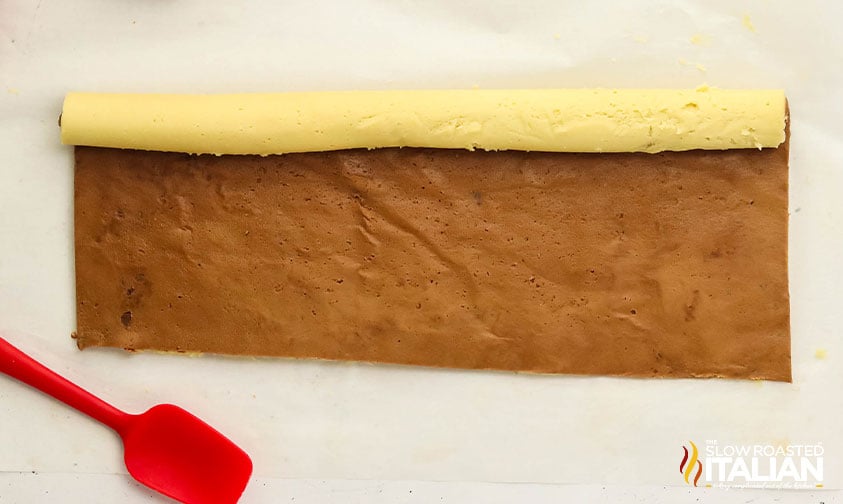
- ROLL DOUGH: Remove one dough half and roll it between two large sheets of parchment paper into a 12×18-inch rectangle, about ¼ inch thick. Repeat with the other dough half.
- LAYER & TRIM: Stack the chocolate dough on top of the plain dough. Trim edges to form even sides (save scraps for marble cookies).
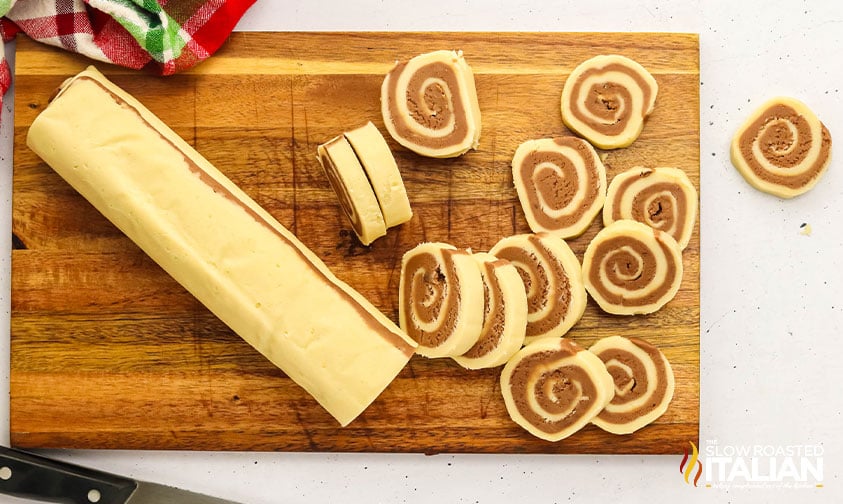
- ROLL INTO LOG: Starting along the long edge, roll up the dough tightly into a log, pressing gently to prevent gaps. Wrap the log in plastic wrap and chill for 1 hour to firm.
- SLICE & BAKE: Preheat the oven to 325°F. Unwrap the chilled dough log and slice into ½-inch rounds. Arrange cookies 1½ inches apart on the prepared baking sheet. Bake for 11 to 13 minutes, until the edges are lightly golden.
- COOL: Let cool on the baking sheet for 5 minutes, then transfer to a wire rack to cool completely.
Donna’s Notes
Nutrition
All nutritional information is based on third party calculations and is only an estimate. Each recipe’s nutritional value will vary depending on the ingredients used, measuring methods, and portion sizes.
Originally published December 2025
Disclosure: Posts may contain affiliate links. If you purchase a product through an affiliate link your price will remain the same and The Slow Roasted Italian will automatically receive a small commission. Thank you for supporting us, it helps us keep creating new recipes.


Welcome!
We’re Donna and Chad, the dream team behind The Slow Roasted Italian. Our focus is on taking complicated OUT of the kitchen. Life is busy enough, making meals should be fast and easy, to help make your life as simple as possible. Read More >>