No Churn Kit Kat Ice Cream
This post may contain affiliate links. Please read my disclosure policy.

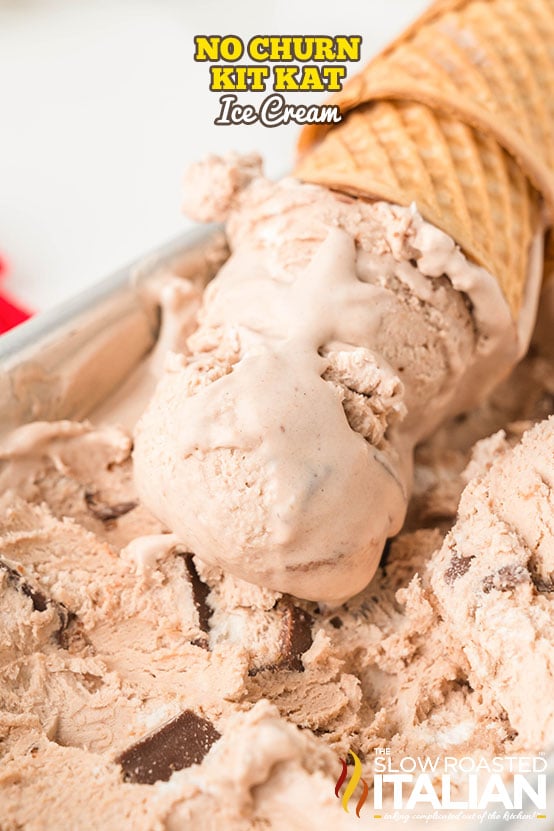
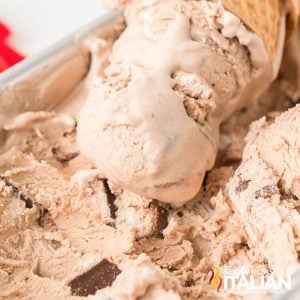
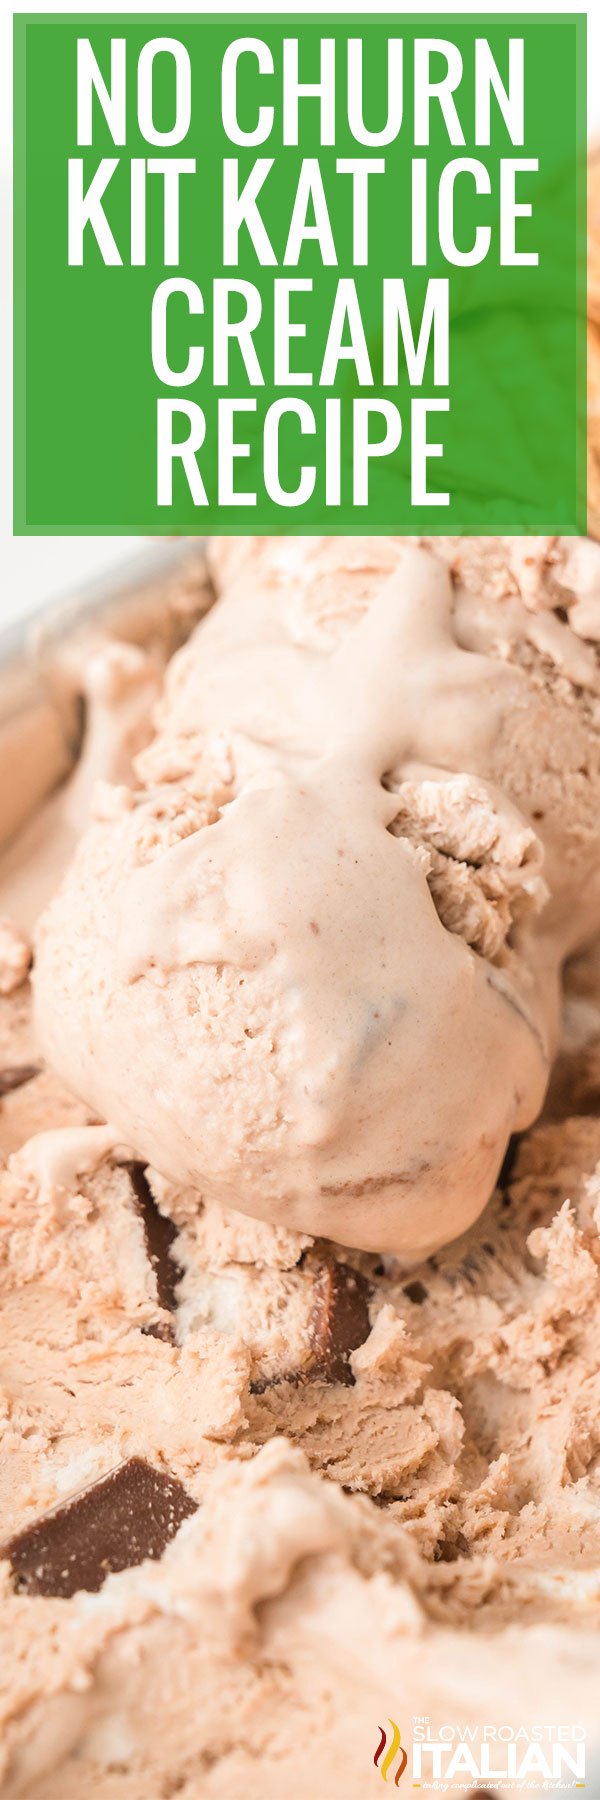
If you’re a chocolate lover, this Kit Kat Ice Cream is for you! Irresistibly decadent with the perfect balance of creamy and crunchy textures… what more could you want from a frozen dessert?? Make sweet, creamy ice cream with Kit Kat pieces scattered throughout, no ice cream machine needed. Only 10 minutes of prep, and you can whip this frozen dessert up anytime a craving strikes. It’ll be ready to eat later that night!
Kit Kat Ice Cream
No-churn ice cream is basically my dessert superpower. When I want something cold, creamy, and ridiculously easy… this is what I make.
And when KitKats are involved? Forget it… I’m all in.
When my sweet tooth is extra strong, I’ll add a drizzle of hot fudge or caramel sauce before serving. Munchkin still loves whipped cream and sprinkles on hers!
This Kit Kat ice cream recipe comes together in minutes, and every single bite is packed with rich chocolate flavor and that signature crunch.
Honestly? If you’re a chocolate lover, this one might ruin all other ice cream for you!!
If you love candies in ice cream like this one, you’ll also adore my no-churn Twix ice cream!
INGREDIENT NOTES
- Heavy Cream: Whip this straight from the refrigerator… the colder the better. In fact, chilling the mixing bowl and beaters first helps even more!
- Sweetened Condensed Milk: The secret to any successful no churn ice cream. It keeps everything thick and creamy, and it sweetens the dessert without the need for sugar.
- Vanilla Extract: Balances the sweetness and adds a classic sweet treat flavor. Pure vanilla extract is best.
- Cocoa Powder: For a little extra chocolate flavor, though you can certainly leave it out for more contrast. Sift well before mixing it into the base to avoid clumps.
- KitKat Bars: There are enough candy bar pieces in this homemade Kit Kat ice cream to ensure crunch in every bite! For less texture, simply reduce the total amount of chopped candy to 1 cup.
VARIATIONS
- Double Chocolate Delight: Mix ½ cup mini chocolate chips into the base before freezing.
- Peanut Butter Kit Kat Ice Cream: Swirl in ¼ cup of creamy peanut butter.
- Malt Madness: Replace the cocoa with malt drink powder.
- Cookies and Cream Twist: Add ½ cup crushed Oreo cookies for extra crunch.
- Mint Chocolate Kit Kat Ice Cream: Swap in mint KitKats and add ¼ teaspoon peppermint extract for a cool variation.
KIT KAT ICE CREAM RECIPE FAQ
At the bare minimum, 4-6 hours, but it might still have a soft-serve consistency. And it can take even longer depending on the flavor or mix-ins.
I typically get mine prepped the night before to be sure it’s completely frozen and ready to eat the next day.
I wouldn’t recommend it. 1 ½ cups of chopped candy bars give you plenty of crunch. Any more, and you’ll mess up the balance of ice cream and Kit Kat!
That said, you can add less candy if you just want a few fun surprises throughout.
Once frozen, transfer no churn ice cream to a container with a lid so it stays nice and creamy.
Store homemade Kit Kat ice cream in the coldest part of the freezer (not the door!) for up to 2 months.
After testing dozens of ice cream recipes over the years, I’ve nailed down the method: whip the cream just enough to hold medium peaks, then gently fold in your mix-ins so you don’t deflate the volume.
Using cold heavy cream right from the fridge is key because it whips faster and holds shape better.
Sweetened condensed milk brings that creamy texture without needing an ice cream machine, and a touch of cocoa balances the sweetness.
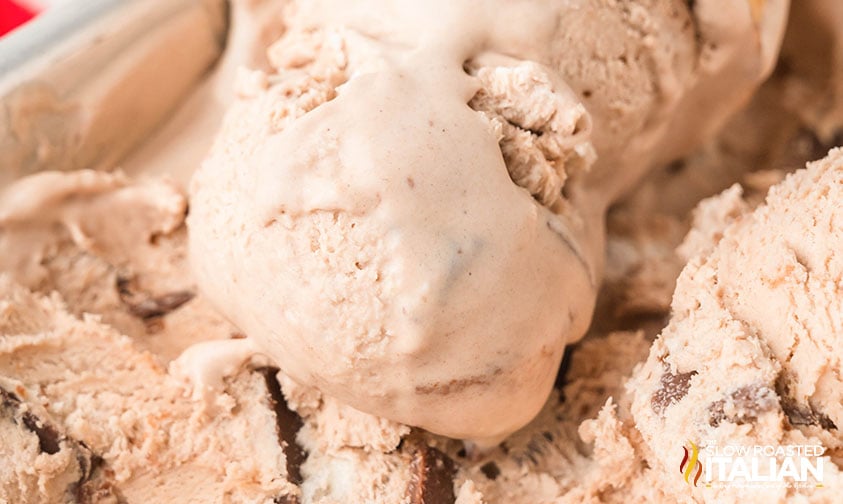
And in the case of this KitKat ice cream, the candy pieces stay crisp and chocolaty, even after freezing. That’s the magic!
DONNA’S PRO TIPS
- Chill the loaf pan in the freezer while preparing the ice cream to help it set faster.
- Make scooping easier by dipping your ice cream scoop or spoon in warm water first.
- Use a knife to slice up the whole loaf for parties.
- To reduce sweetness, use dark chocolate KitKats and unsweetened cocoa powder.
- Crumble KitKats on top just before serving for added texture and flair.
- This is a great make-ahead dessert for birthdays, parties, or a freezer stash of chocolate therapy.
TOOLS NEEDED
- Knife and cutting board
- Large mixing bowl
- Handheld mixer or stand mixer – Use the whisk attachment when whipping the cream.
- 9 x 5-inch loaf pan
Enjoy!
With love, from our simple kitchen to yours.
Don’t miss a thing! Follow us on
Facebook | Twitter | Pinterest | Instagram

🔥 TSRI’s Sizzlin’ Summer Ebook
Ready to level up your summer cooking? This exclusive collection of 30 reader-favorite recipes is packed with potluck legends, no-bake treats, and BBQ showstoppers.
👉 Snag your copy today and bring the heat to your summer table!
No Churn Kit Kat Ice Cream
Ingredients
- 1 1/4 cups heavy cream
- 14 ounce can sweetened condensed milk
- 1 tablespoon cocoa powder
- 1 teaspoon pure vanilla extract
- 1 1/2 cups KitKat bars, chopped (about 12 fun size bars)
- Extra KitKat bars, for garnish
Instructions
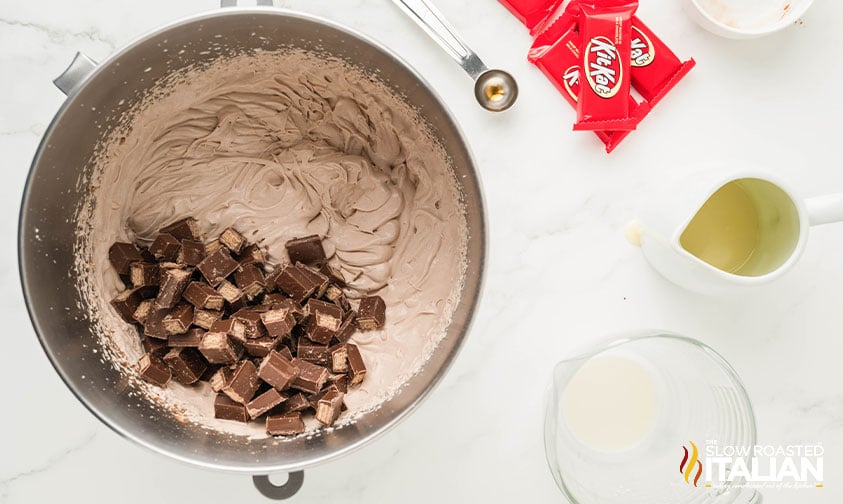
- Chop the KitKats: Use a sharp knife to chop 1 1/2 cups KitKat bars into 1/2- to 1-inch pieces. Set aside.
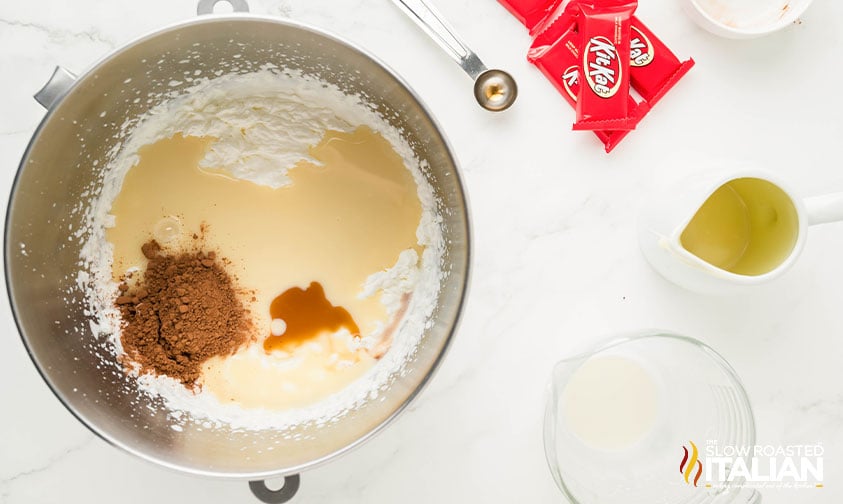
- Whip the Cream: In a large mixing bowl, use a handheld mixer to beat the 1 1/4 cups heavy cream until firm peaks form, about 3 to 4 minutes.
- Combine Ingredients: Add 14 ounce can sweetened condensed milk, 1 tablespoon cocoa powder, and 1 teaspoon pure vanilla extract to the whipped cream. Beat again for 4 to 5 minutes until thickened and peaks begin to form.
- Fold in Candy: Gently stir in the chopped KitKat bars.
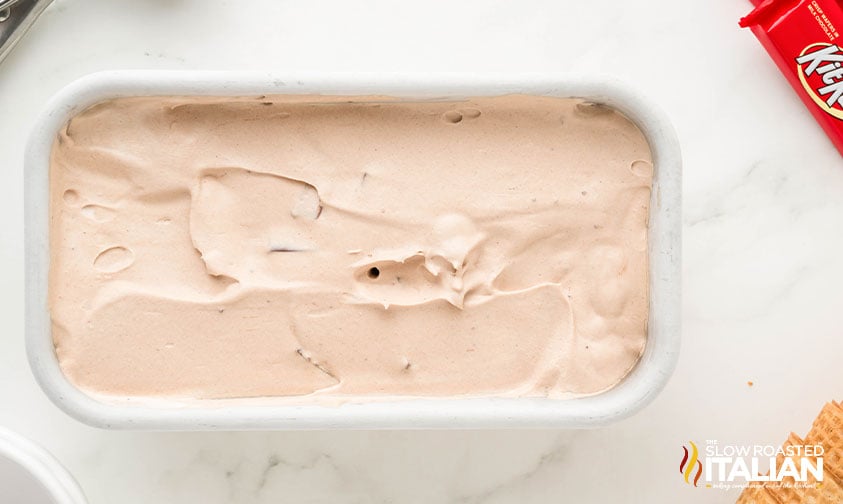
- Freeze: Pour the mixture into a 9 x 5-inch loaf pan and smooth the top. Garnish with extra KitKat pieces.
- Freeze Until Firm: Cover and freeze for at least 6 hours or until solid.
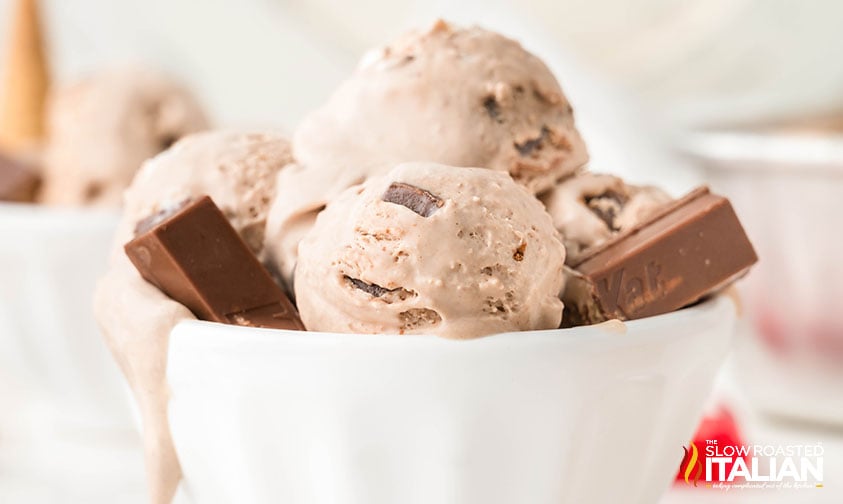
- Serve: Let thaw slightly before scooping. Enjoy with even more KitKats on top if desired.
Donna’s Notes
Customization Ideas: Mix in chocolate chips, swirl in fudge, or top with whipped cream and sprinkles before serving. Crunch Factor: This recipe includes enough KitKats to ensure crunch in every bite. For less texture, reduce to 1 cup chopped KitKats.
Nutrition
All nutritional information is based on third party calculations and is only an estimate. Each recipe’s nutritional value will vary depending on the ingredients used, measuring methods, and portion sizes.
Originally published August 2025
Disclosure: Posts may contain affiliate links. If you purchase a product through an affiliate link your price will remain the same and The Slow Roasted Italian will automatically receive a small commission. Thank you for supporting us, it helps us keep creating new recipes.


Welcome!
We’re Donna and Chad, the dream team behind The Slow Roasted Italian. Our focus is on taking complicated OUT of the kitchen. Life is busy enough, making meals should be fast and easy, to help make your life as simple as possible. Read More >>