

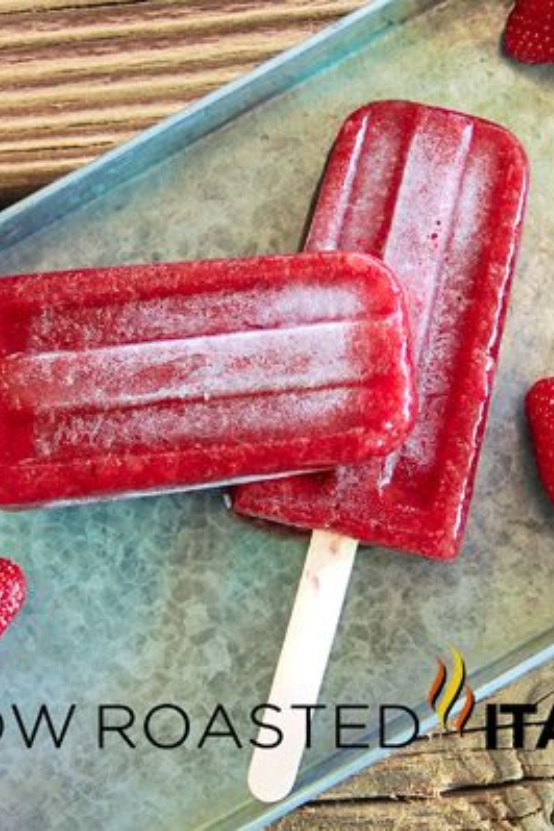
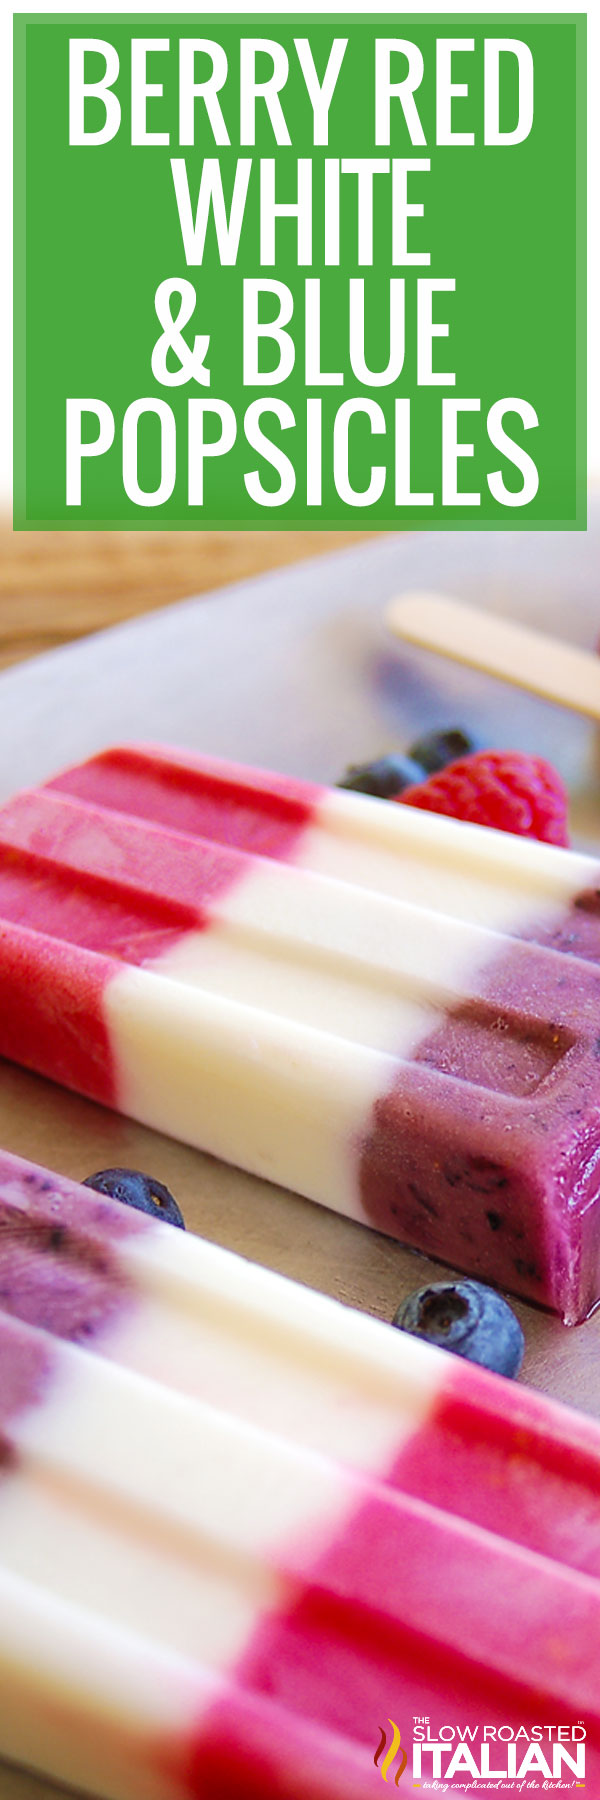
Berry Red White and Blue Popsicles
This post may contain affiliate links. Please read my disclosure policy.
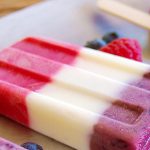
These fantastic Red White and Blue Popsicles make the perfect 4th of July treat! Cold, refreshing, and packed with vitamin C, antioxidants, and power-boosting protein thanks to the fruit and yogurt! Stunning to look at and spectacular to eat, kids and adults alike will gobble these up! Simple recipe, fabulously refreshing.
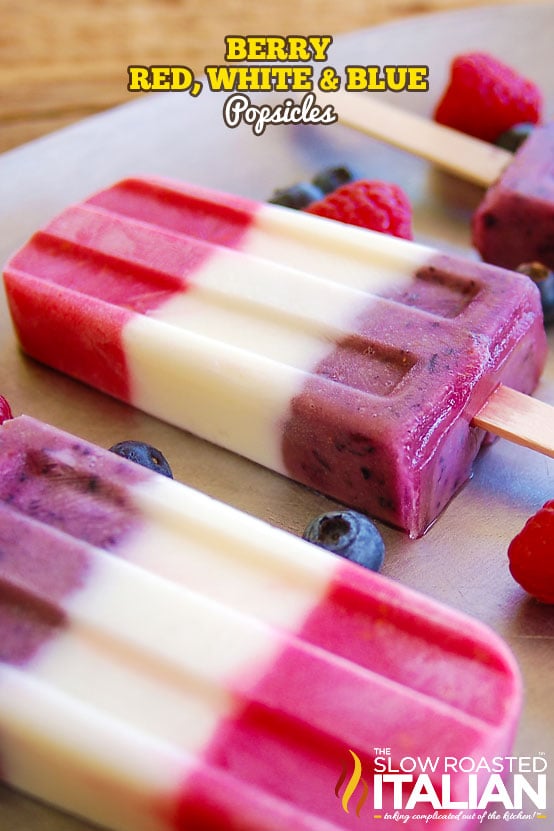
Table of Contents
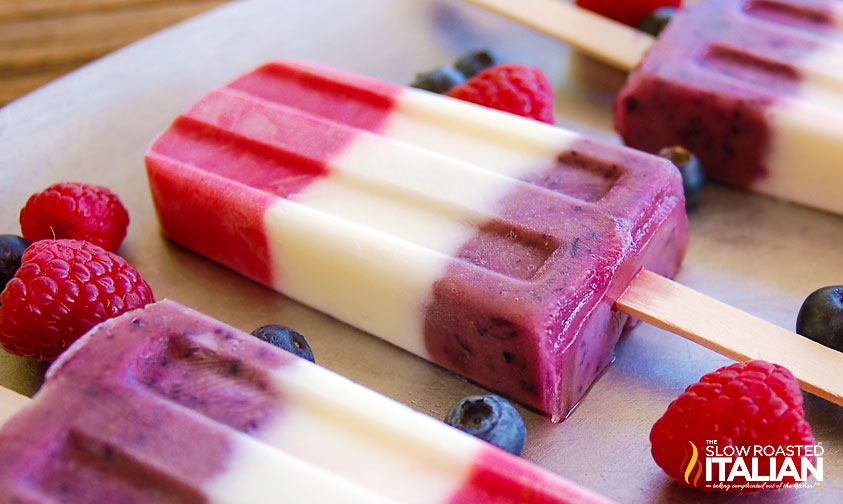
Red White and Blue Popsicles
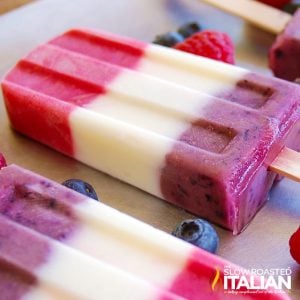
These red white and blue popsicles are simply delicious and have only 5 ingredients!
Made with fresh fruit, all-natural yogurt, honey, and your favorite vanilla, they’re a must at our annual Fourth of July cookout.
I actually came up with them because I wanted to be able to give Munchkin a delicious dessert that wasn’t full of artificial ingredients and tons of sugar.
Berry yogurt popsicles are definitely a dessert I am proud to feed my daughter, and I love to watch her dive in!
She always eats the center first — the vanilla honey yogurt layer is her favorite. Go figure. She knows what she wants! You’ll have to let me know which layer is your favorite in the comments below.
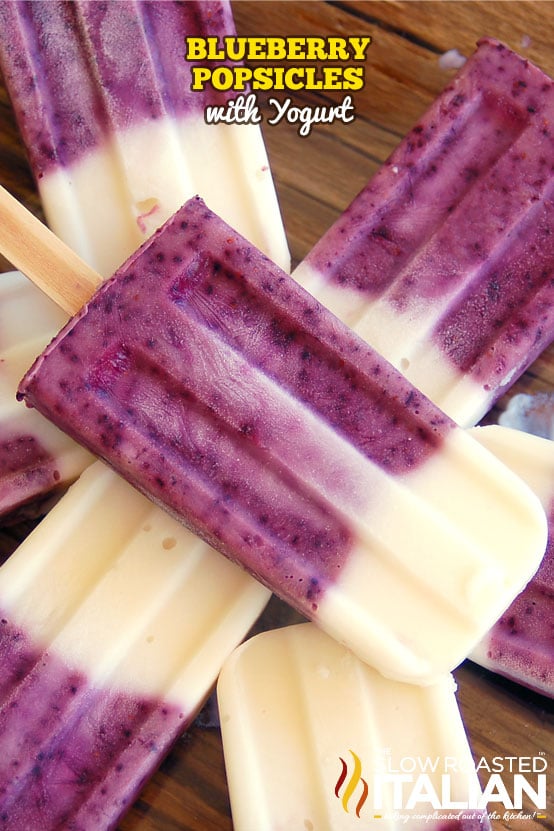
We have more amazing popsicles for you to try and even a handy guide to help you make them!
Ingredient Notes and Substitutions
- Plain Yogurt – Needed for the creamy white layer and the blueberry one! I also find the added yogurt balances out some of the sweetness from the fruit and honey.
Greek yogurt would make these protein-packed and give you a slightly thicker consistency! You could even try using coconut yogurt as a plant-based option. - Honey – No refined sugar to be found in these red white and blue popsicles! Honey also helps keep the texture soft and prevents the ice pops from becoming too icy.
- Blueberries – The star of the blue layer! When smashed they create a slightly chunky texture too.
Blackberries are another option if you want a deeper flavor. - Raspberries – Unsurprisingly, raspberries make up the red layer! Strawberries or cherries can be used here instead.
- Vanilla Extract – To enhance the overall flavor of the berry yogurt popsicles while adding a subtle sweetness. It makes the yogurt layer taste like vanilla ice cream!
Tips and Tricks to Make Perfect Berry Popsicles
- Loosen stiff honey.
Stiff or cold honey will be difficult to mix into the yogurt and fruit.
You can warm it slightly by placing the jar in a bowl of warm water for a few minutes. This will help it blend without clumping.
- Partially freeze layers for true red white and blue popsicles.
When I say “true,” I mean you can clearly see the red, white, and blue layers!
I find popping each portion in the freezer while I work on the next one is the best way to achieve this.
The longer you leave each layer to sit, the more distinct the sections will be!
- Use high-quality vanilla extract.
Get the most bang for your buck and use a fabulous vanilla extract! I love Neilsen-Massey Madagascar vanilla in these berry popsicles.
Or if you have Madagascar vanilla beans, they would also be amazing! Just scrape the beans out of 1 pod and add them to the yogurt.
The vanilla really carries the creamy yogurt center to a whole new level.
- Blend for a smoother texture.
If you prefer smoother berry popsicles, blend the fruit and yogurt mixtures with your food processor or blender instead of just smashing and stirring.
You’ll get a more uniform texture without messing with the fruity flavor!
Prep Ahead
- Bring honey to room temp if needed
- Wash and clean berries
Kitchen Tools You Will Need
- Mixing Bowls – I like to have a variety of sizes on hand, and this set has them all.
- Food Processor or Blender to blend the fruit and yogurt.
- Ice Pop Mold – Silicone molds are ideal! This one comes with reusable sticks too.
Fun Mix-Ins
Use my berry popsicle recipe as a base and then make it your own! There are quite a few options here — don’t be afraid to get creative.
I’ve added shredded coconut to the white center for some extra texture. It also pairs great with the berries! Added lemon zest also works super well in the yogurt layer.
Incorporating some chia seeds with the fruit would add fiber and more texture too.
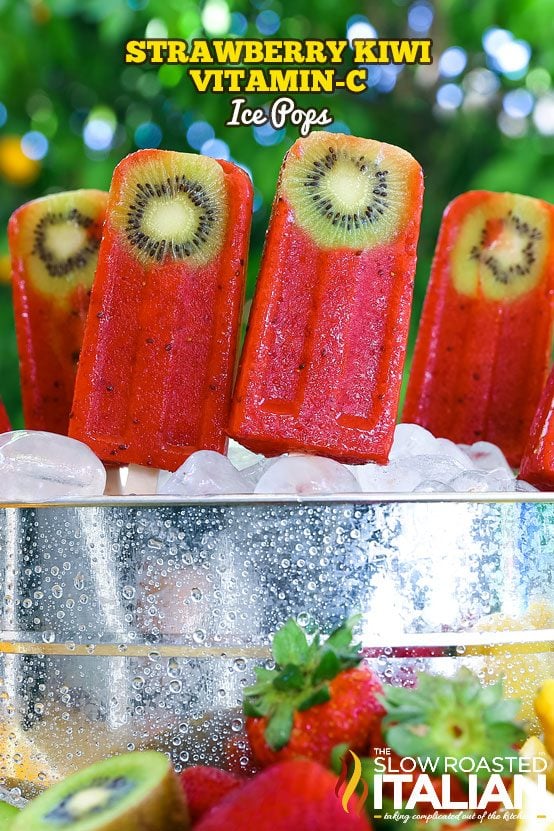
Leave whole berries in your firecracker popsicles for another fun option! They’ll look similar to these kiwi pineapple ice pops or my tasty raspberry lemonade yogurt popsicles — SO good!

Storing Firecracker Popsicles
Once the popsicles are fully frozen (they should be good to go after 12-24 hours), remove them from the molds and wrap them individually in parchment paper.
Place in a zip-top bag to protect against freezer burn and store for up to 1-2 months for the best taste and texture.
Berry Popsicle Recipe FAQ
There are so many different names for this berry popsicle recipe! Some call them firecracker popsicles, while others refer to them as bomb pops or rocket pops.
Whatever you call them, they’re perfect for the Fourth of July. Or pretty much any other time of the year when the craving hits!
I know 12-24 hours is a pretty big window, but all freezers vary. They’ll become more solid the longer you leave them, so I usually try to keep mine in the freezer at least overnight and then some.
Typically, I’ll make them at some point in the afternoon, and then they’re ready to enjoy after dinner the next day.
I prefer fresh fruit myself, but frozen can be used as a substitute. Just make sure to thaw it before smashing to get rid of some of that excess moisture.
Frozen fruit naturally releases more liquid, so you may need to adjust the amount of honey or yogurt if the mixture seems too runny.
Enjoy!
With love, from our simple kitchen to yours.
Don’t miss a thing! Follow us on
Facebook| Twitter| Pinterest| Instagram

🔥 TSRI’s Sizzlin’ Summer Ebook
Ready to level up your summer cooking? This exclusive collection of 30 reader-favorite recipes is packed with potluck legends, no-bake treats, and BBQ showstoppers.
👉 Snag your copy today and bring the heat to your summer table!
Berry Red White and Blue Popsicles
Ingredients
- 2 cups plain yogurt, divided
- 3 tablespoons honey, divided
- 6 ounces blueberries, washed
- 6 ounces raspberries, cleaned
- 1 teaspoon vanilla extract
Instructions
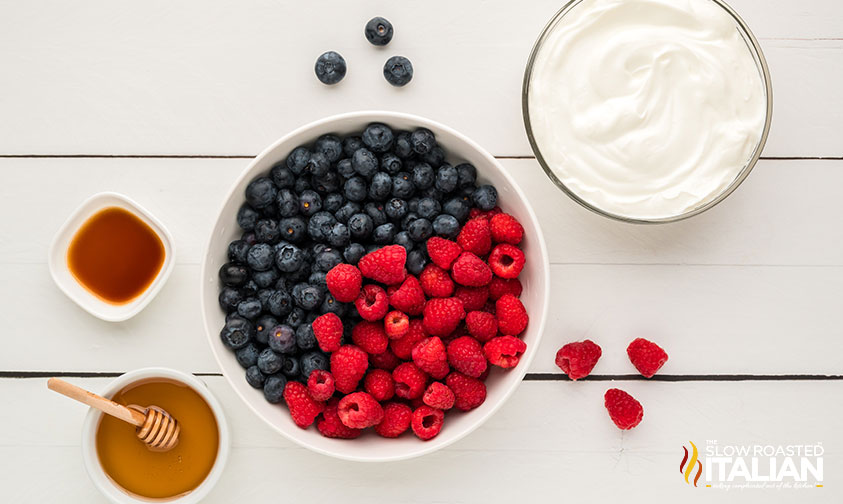
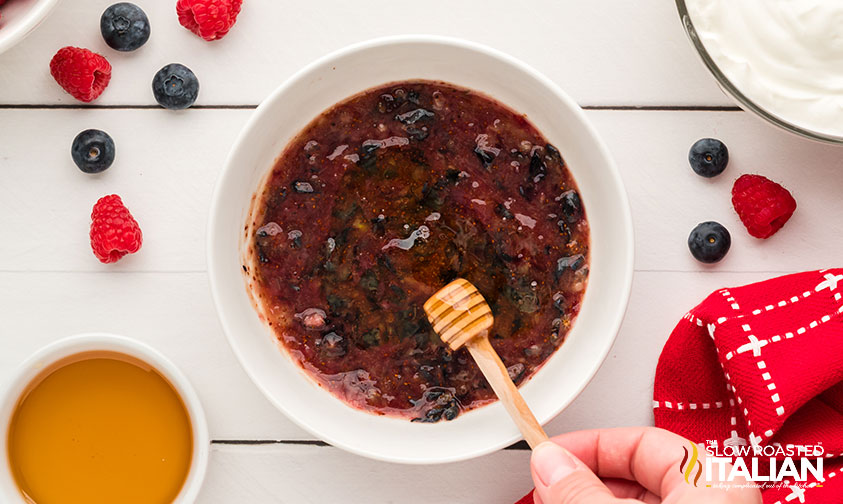
- Place raspberries in a small bowl. Drizzle 1 tablespoon of honey over top and stir to combine. Set aside.
- Place blueberries in a small bowl. Smash with fork. Drizzle 1 tablespoon of honey over top and stir to combine. Set aside.Leave berries to sit for a few minutes while you prepare your popsicle molds.
- Smash raspberries with a fork and mix in 1/2 cup yogurt. Stir until well combined. You can blend these in a mini food processor or blender if you would like a really smooth consistency.
- Pour about 1 1/2 tablespoons of raspberry mixture into each popsicle mold. Place popsicles in freezer to slightly firm while you prepare the remaining ingredients.
- Smash blueberries well and mix in 1/2 cup yogurt. Stir well to combine. You can blend these in a mini food processor or blender if you would like a really smooth consistency.
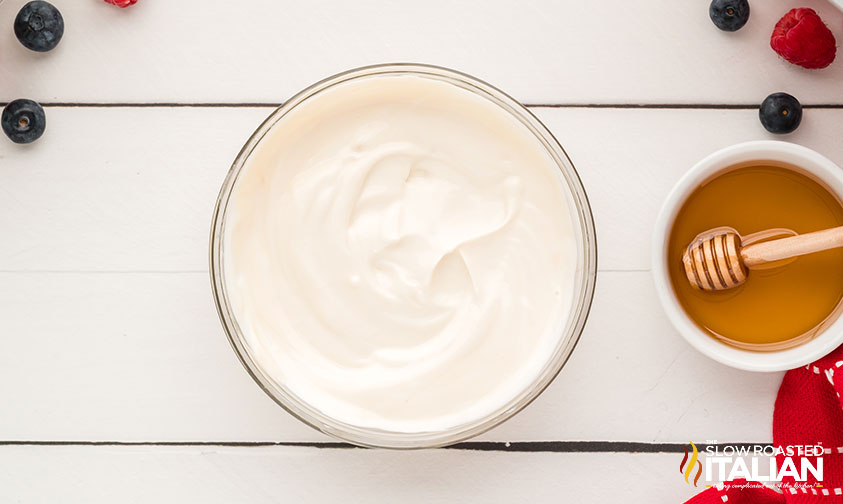
- In a small bowl combine 1 cup yogurt, 1 tablespoon honey and 1 teaspoon vanilla extract.
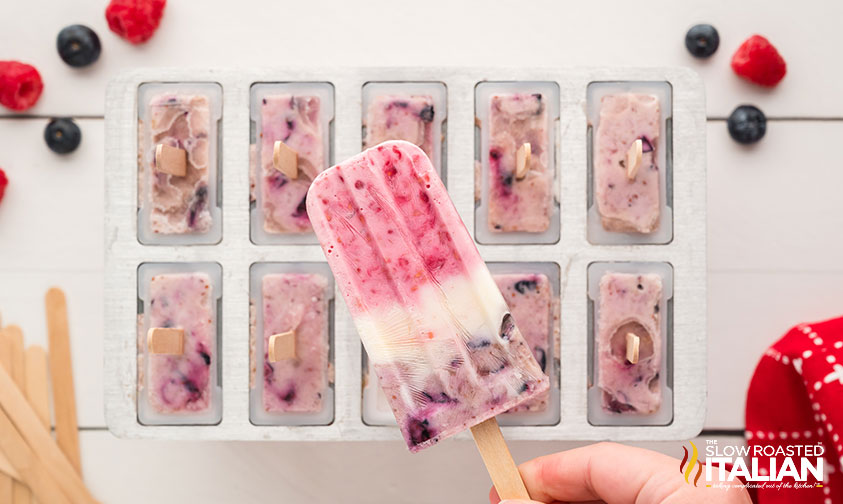
- Remove popsicles from freezer and divide yogurt between popsicle molds, filling each to about 2/3 full.
- Divide blueberry mixture between popsicles, filling each almost to the top (popsicles will slightly expand when freezing).
- Cover molds with aluminum foil. Poke holes in each slot and place a popsicle stick about 1/2 way in. Return to freezer for 12-24 hours.
Nutrition
All nutritional information is based on third party calculations and is only an estimate. Each recipe’s nutritional value will vary depending on the ingredients used, measuring methods, and portion sizes.
Originally published June 2012, updated and republished May 2025
Disclosure: Posts may contain affiliate links. If you purchase a product through an affiliate link your price will remain the same and The Slow Roasted Italian will automatically receive a small commission. Thank you for supporting us, it helps us keep creating new recipes.


Welcome!
We’re Donna and Chad, the dream team behind The Slow Roasted Italian. Our focus is on taking complicated OUT of the kitchen. Life is busy enough, making meals should be fast and easy, to help make your life as simple as possible. Read More >>


I pinned this beautiful recipe! Where can I find these molds? These are wonderful. You are an artist!
Check Amazon Tricia. That is where we get all our molds. Thank you so much for the support sweetie!
Look's so delicious!
Thanks for stopping by Elizabeth. Your dads cake look fantastic!
Your welcome and thanks for stopping by my blog and posting that lovely comment! Amaretto Cake with Custard filling sounds so good! ^_^
Thanks for the link DB. 'Tis the season for red white and blue. : )
I pinned the recipe. I can't wait to try it! They look so tasty.
Thanks Kit Kat! I am sure you will love them.
You know, I aalmost skipped over this because Michelle of Brown Eyed Baker posted a similar recipe yesterday and I thought I was having deja vu. Your's look equally refreshing!
I pinned the Red, White & Blue Popsicles article:
http://pinterest.com/pin/111112315777133053/
Those popsicles look divine! AND healthy and i have home made yoghurt from my cows milk AND honey from my own bees and blueberries coming on my bushes! Can't do the red tho (sad face) have to buy those.. wonderful.. the mojito looks mighty fine too! c
Oh cecelia! I am green with envy. Your own milk, honey and blueberries! Lucky girl. Hard working girl, I am sure. I bet these are going to be delicious with your amazing ingredients!
I'm not much of a recipe gal, but when I saw the picture of these I had to check them out – they look SO good, and I was really surprised to see they look like something I could actually make! I don't think I can get molds in time for the 4th, but my kids would love these any time (if I don't eat them all first)!
These are soooo easy Robyn. When my mold is otherwise engaged, I will make my munchkin 'cupsicles'. I buy the little 3 ounce plastic cups at Wal-mart and popsicle sticks in the craft department. They are the perfect size and my husband and I will just eat 2. Enjoy and have a fab 4th!
I feel like a rock star – I've made a couple batches of these and they're SO good! My kids love them, and I feel good about letting 'em eat them because of all the yummy ingredients. I still don't feel good about sharing them, though. Thanks for the tip about the cupsicles – I'll be making those, too!
I posted today about this recipe and included the pin back to this post, and also added it to my community pin board from my personal recipe board – love it!
http://www.hollowtreeventures.com/2012/07/popsicles-and-posh-mom.html
I am so happy to hear you love them too. Sharing is still sketchy here. We prefer to keep them for ourselves. LOL
I'll check out your post.
I just pinned this recipe, it looks so delicious! I'll be checking Amazon for the beautiful molds, mine are junk!
More deliciousness for me to drool over! I'm featuring this in today's Food Fetish Friday (with a link-back and attribution). I hope you have no objections and it's always fun to be following along with your creations…
Mmmm…these popsicles look like the perfect way to beat the heat. I how simple they are, and I know they have to taste delicious! I hope you'll drop by to share them with my Summer of the Popsicle (http://www.girlichef.com/2012/05/summer-of-popsicle-2012.html)! =)
Just making the red, white and blue popsicles right now!! I didn't have raspberries, but had just picked boysenberries and fresh blueberries. Later I'm going to try peaches and yogurt. I love your easy directions too. Barb
OH THANK YOU THANK YOU THANK YOU!! We have 20 month old grandbabies living with us.I have been searching things to make for them. Will try the meatballs and chicken nuggets and cupsicles! You are a life saver for sure. Our son, when small was allergic to EVERYTHING, so I have been watching these 2 closely. Twin boy loves food, except green beans. Twin girl, very picky. Will try them all. PLEASE keep the recipes coming.
All the images looks beautiful. Thanks for sharing the recipe. I will definitely try this red white and blue berry popsicles.
It looks and sounds delicious!! Will definitely do those. But I didn't understand the aluminum foil part… please explain. Thank u
I just made these and they taste great! I think these may be my favorite frozen treat I have ever made!