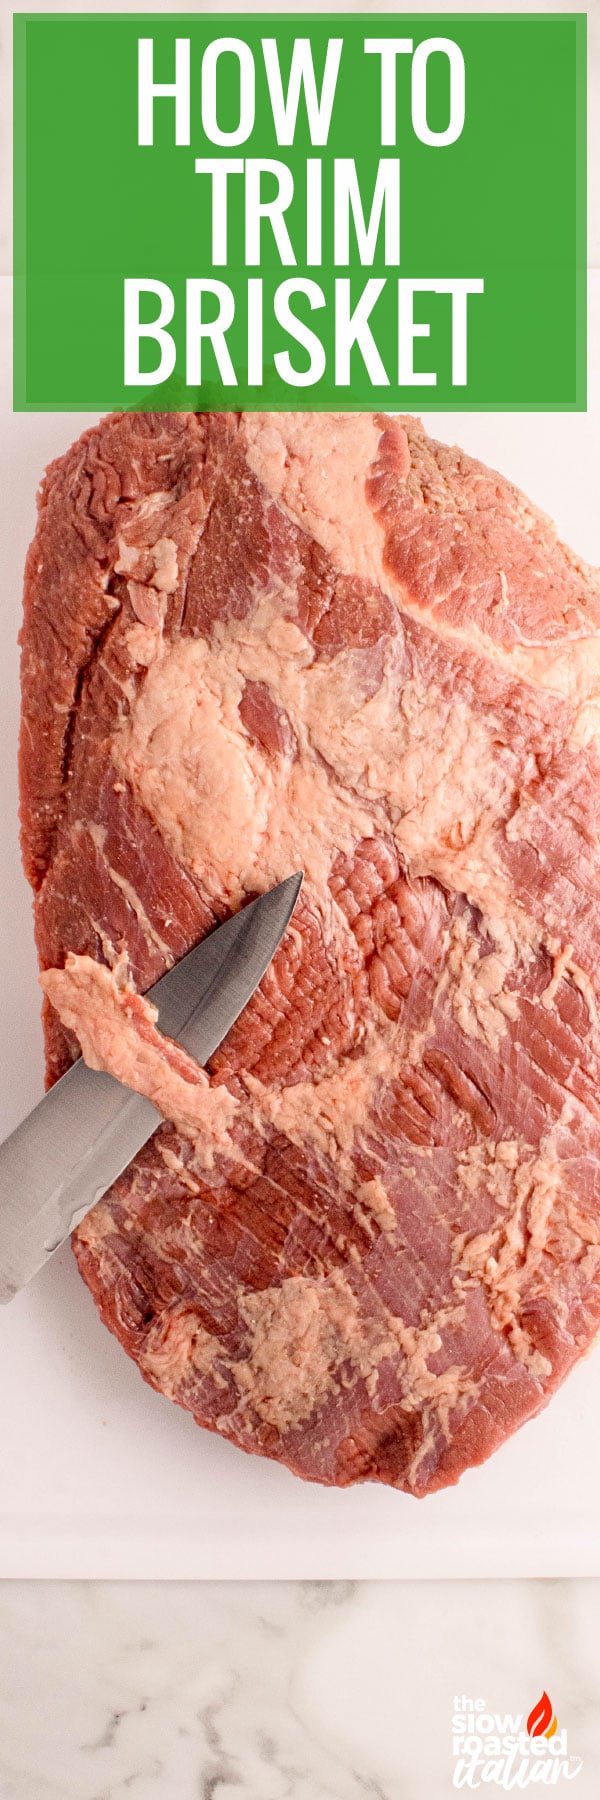
How to Trim a Brisket
Learning How to Trim a Brisket can seem daunting, but I promise it’s simpler than it looks. Once you identify each part and understand the difference between hard fat and soft fat, it’s smooth sailing from there. We’ll cover everything you need to know, what tools you’ll need (spoiler: it’s a knife), and where you might have gone wrong along the way. Once it’s done, you’ll be ready to toss that bad boy on the smoker!
QUICK ANSWER
Trimming a whole brisket is all about removing the hard fat, thinning the fat cap to about ¼ inch, and shaping the meat so it cooks evenly.
You don’t need fancy tools. You don’t need butcher-level skills. You just need to know what to look for… and what to leave alone.
Learning how to trim a beef brisket can feel like a lot. Big piece of meat. Sharp knife. No clear lines.
But once you understand what you’re looking for? It all comes into focus real fast. You stop guessing and start recognizing.
And suddenly… it’s just part of the process.
BEFORE YOU START
Don’t pick up a knife just yet… let’s get oriented.
A whole packer brisket has two parts:
- Flat: Leaner, more uniform, slices nicely
- Point: Thicker, fattier, more flavorful
Between them is a thick, hard layer of fat. That’s the problem area.
On top, you’ve got the fat cap… which we’re keeping, just not all of it.
If it feels soft, it’ll render. If it feels hard and waxy, it won’t.
WHY TRIMMING MATTERS
This isn’t about making it pretty. It’s about cooking it right.
- Even thickness = even cooking
- Less hard fat = better texture
- Proper fat cap = better bark
Skip the trimming step, and you’ll fight it the whole way through cooking.
TOOLS YOU NEED
Keep this simple.
- Sharp Boning Knife: Or any sharp knife, honestly. I use Wusthof.
- Large Cutting Board: Something sturdy that won’t slide around.
- Paper Towels: For grip.
That’s it. No gadgets. No nonsense.
STEP-BY-STEP: HOW TO TRIM A BRISKET
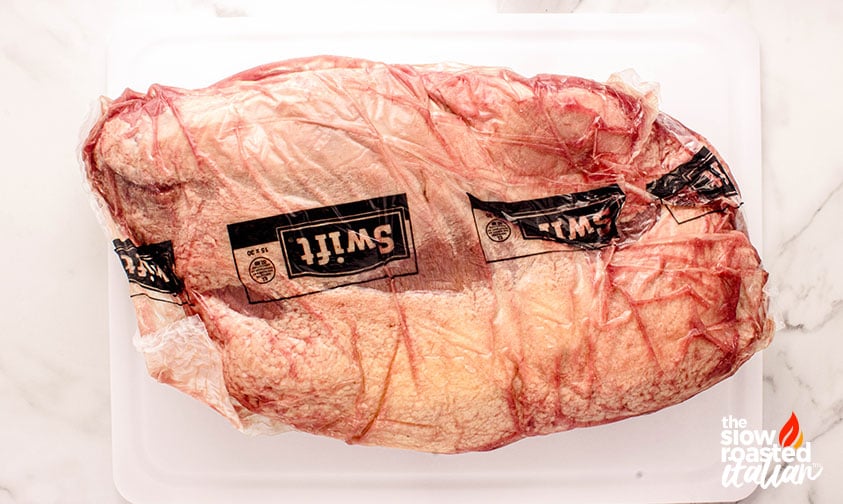
STEP 1: START WITH COLD BEEF
Take it straight from the fridge.
Cold fat is firm. Firm fat is easier to cut.
STEP 2: IDENTIFY THE SIDES
Flip it over.
You’re looking at:
- Meat side
- Fat cap side
- The seam between point and flat
Take a second here. This matters.
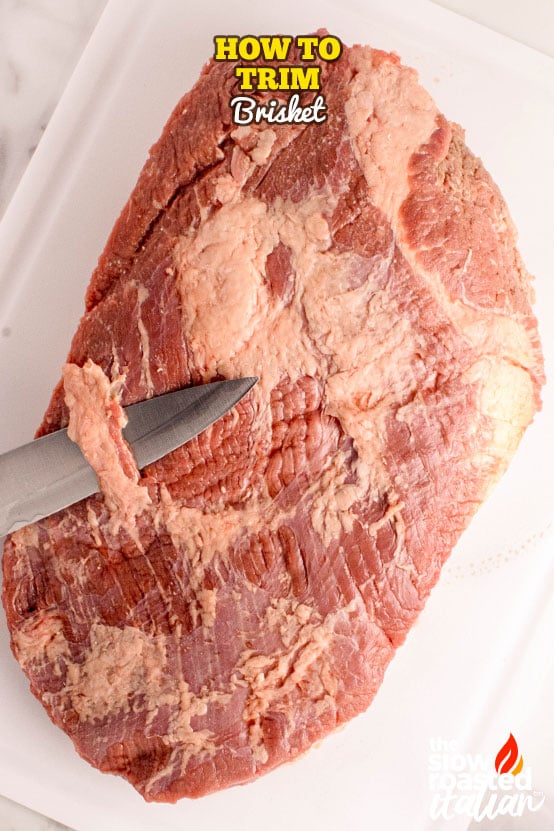
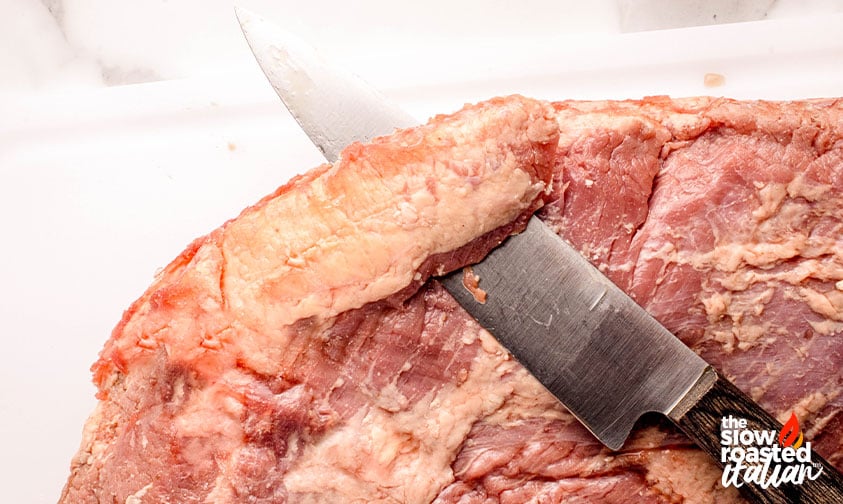
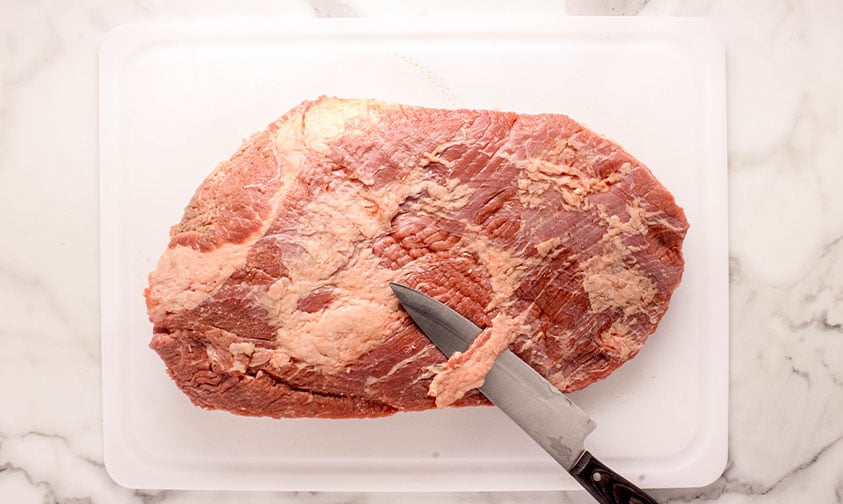
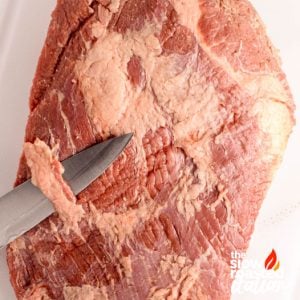
STEP 3: REMOVE THE HARD FAT
Find the thick, waxy fat between the muscles. This is the deckle.
It will feel:
- Firm
- Dense
- Almost like candle wax
Start trimming it out carefully.
Don’t dig into the meat… just follow the seam.
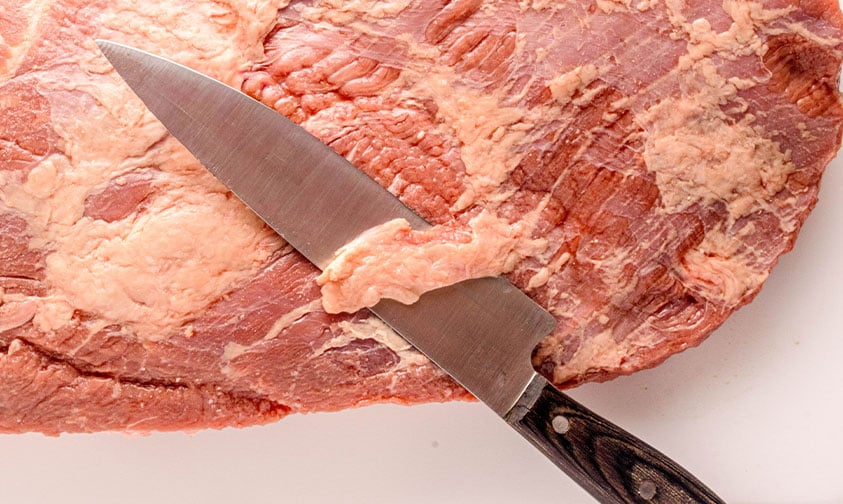
STEP 4: TRIM SILVER SKIN
Still on the meat side.
Look for thin, shiny membrane. Slide your knife just under it and remove in strips.
This part doesn’t break down during cooking.
STEP 5: CLEAN UP THE EDGES
Now look at the shape.
You’ll see:
- Thin flaps
- Ragged edges
- Uneven corners
Trim those off. They’ll burn or dry out anyway.
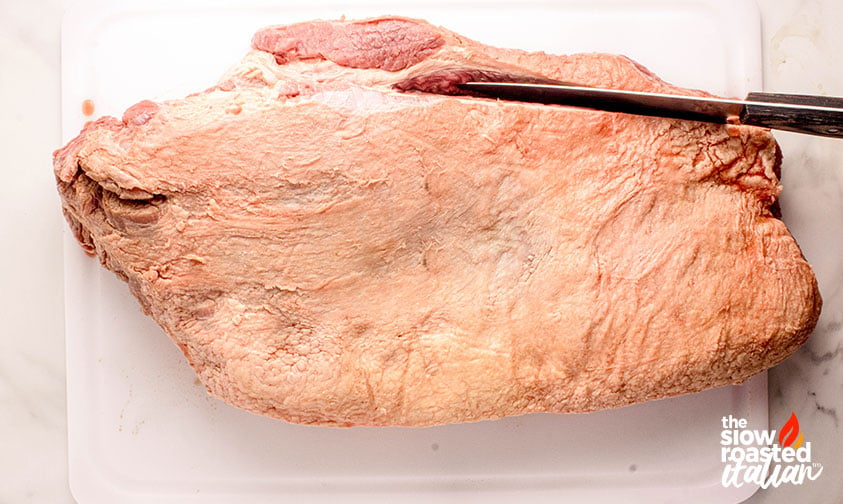
STEP 6: REMOVE THE “MOHAWK”
On the point, there’s often a raised strip of meat. That’s the “mohawk.”
Trim it down so it matches the rest of the brisket.
Doing so helps everything cook evenly.
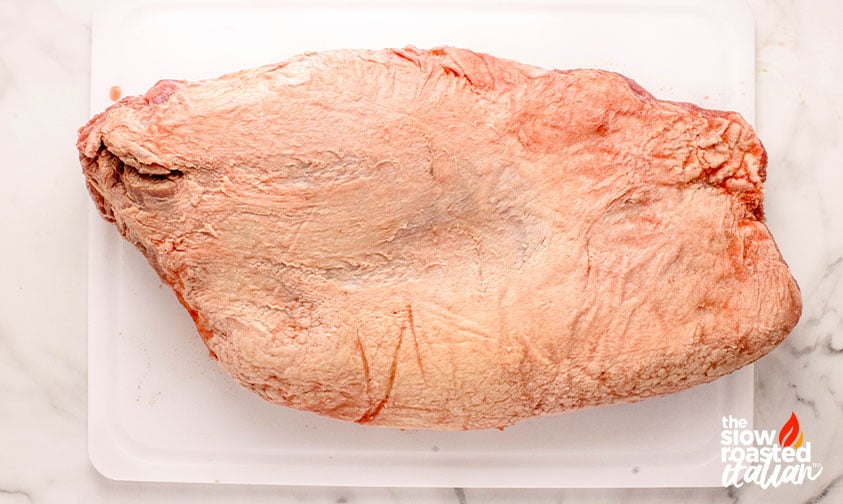
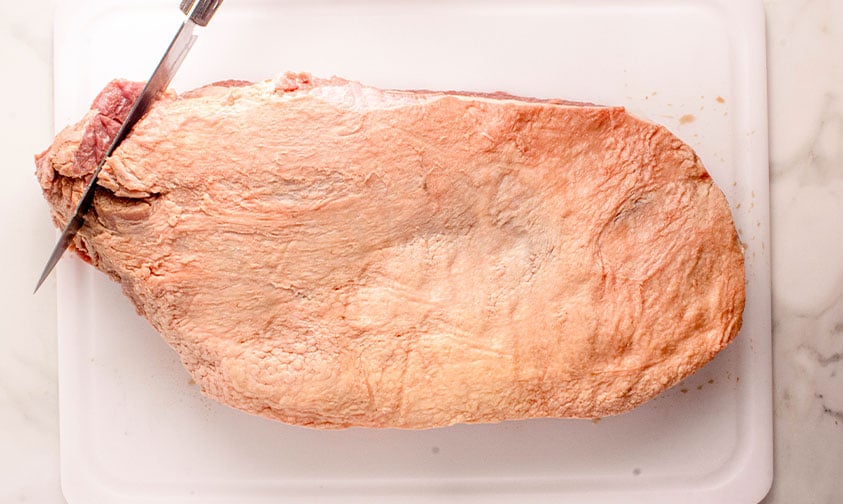
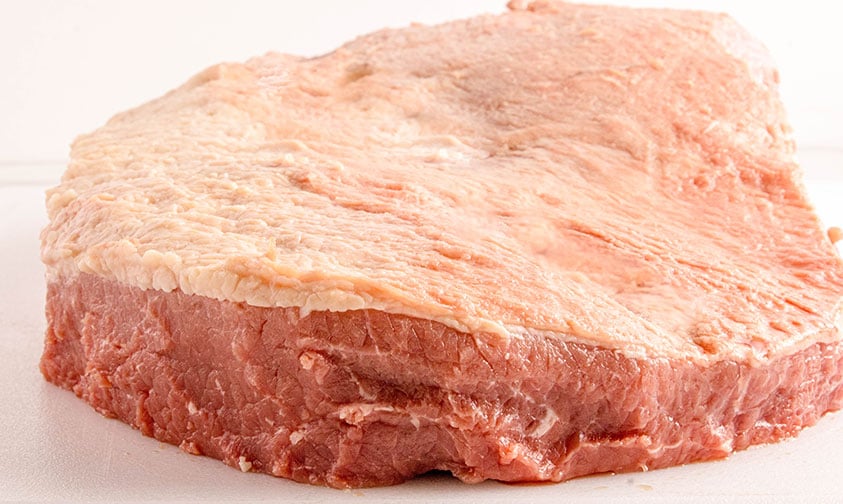
STEP 7: TRIM THE FAT CAP
Flip the meat fat-side up. Now we shape.
Trim the fat cap down to about:
👉 ¼ inch across the surface
Not zero.
Not thick.
Even.
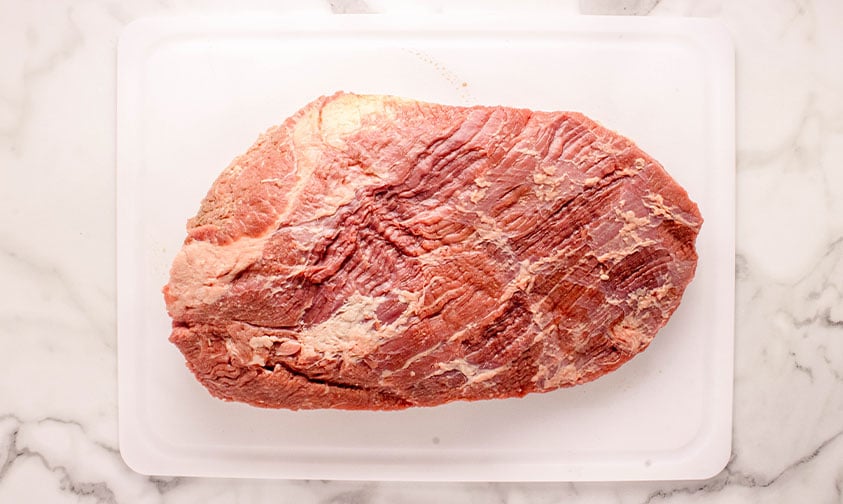
STEP 8: FINAL SHAPE CHECK
You’re looking for:
- Smooth edges
- Even thickness
- No hard fat pockets
It doesn’t need to be perfect.
It just needs to cook evenly.
BEFORE & AFTER
For you visual learners figuring out how to trim a brisket. This is where it clicks.
One is bulky and uneven.
The other is clean, balanced, and ready to cook.
That’s the goal.
COMMON MISTAKES
This is where most people get tripped up when first learning how to trim a whole brisket.
- Not removing hard fat
→ It will not render. Ever. - Taking off too much fat
→ You’ll lose moisture and flavor - Trimming warm brisket
→ Slippery, messy, harder to control - Leaving thin edges
→ They overcook fast - Obsessing over perfection
→ This is cooking, not surgery
WHAT TO DO NEXT
Now that your beef brisket is trimmed… It’s time to move on to seasoning.
And then cooking it low and slow until the meat is falling apart because it’s so tender and juicy.
Recommended next steps:
- How to Smoke a Brisket
- Sweet BBQ Dry Rub
- How to Make Beef Tallow
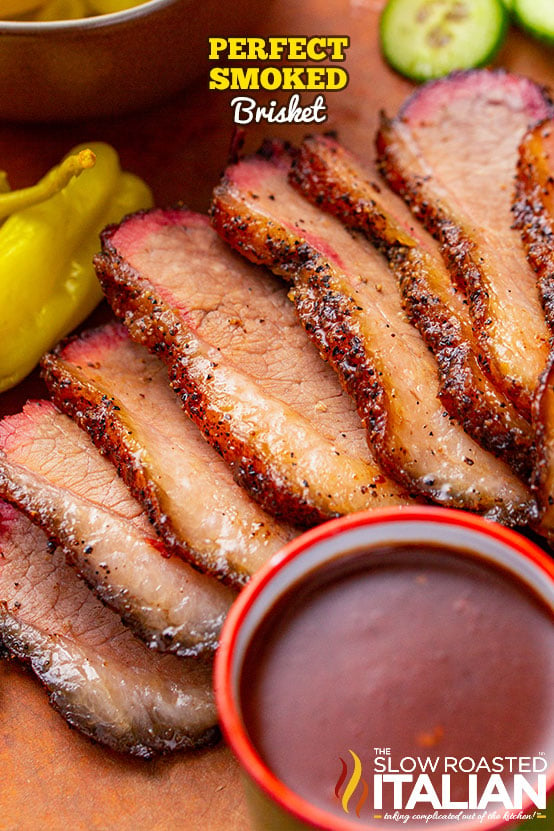
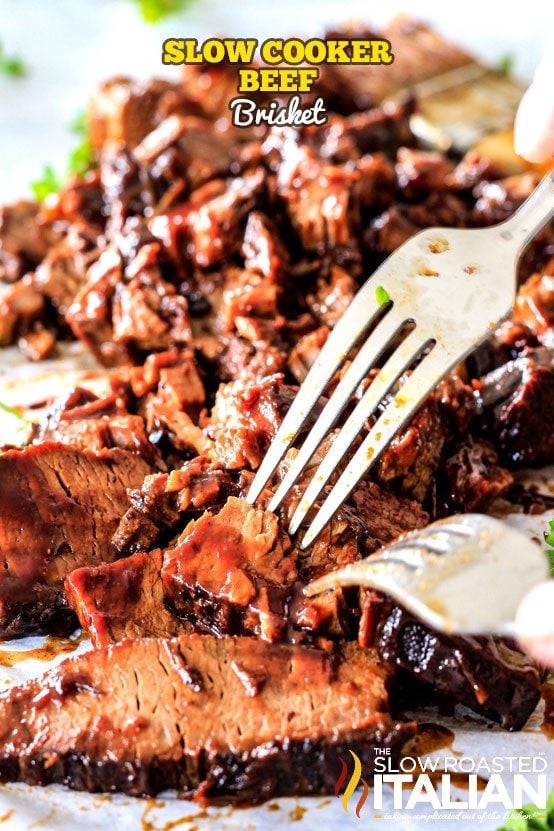
- Slow Cooker Beef Brisket (Homemade BBQ Sauce)
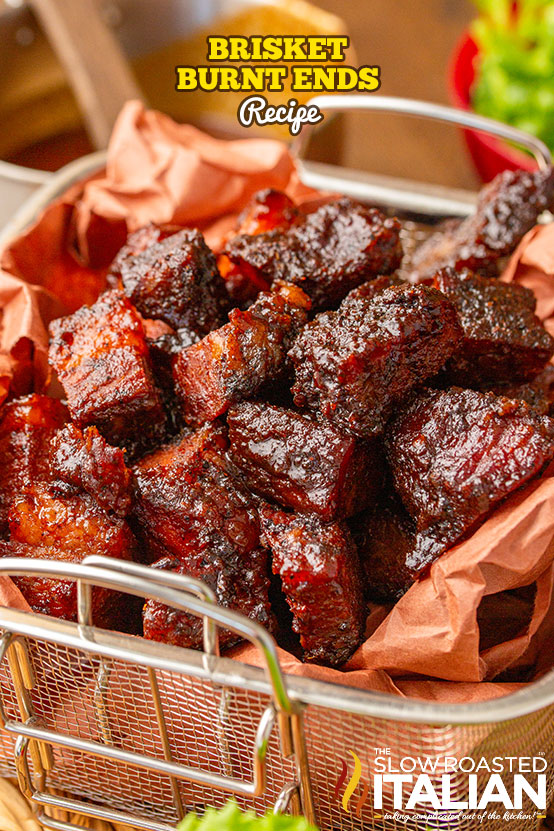
- Brisket Burnt Ends
FAQ
Yes. If you don’t, it won’t cook evenly and you’ll end up with tough fat.
About ¼ inch on the fat cap.
It’s dense fat between muscles that doesn’t render during cooking.
You can… but most don’t trim it for smoking. It’s worth learning how to trim brisket yourself.
QUICK REFERENCE
- Start cold
- Remove hard fat
- Trim silver skin
- Clean edges
- Remove mohawk
- Trim fat cap to ¼ inch
- Keep it even
FINAL NOTE
You’re not trying to win a competition here.
You’re trying to cook a brisket that:
- cooks evenly
- tastes incredible
- and doesn’t fight you the whole time
And that starts right here. Learning how to trim a beef brisket for smoking (or any other slow-cook method) will pay off in spades.
You’ll know exactly what you’re looking at and exactly how to adjust if the butcher got a head start.
Enjoy!
With love, from our simple kitchen to yours.
Don’t miss a thing! Follow us on
Facebook| X | Pinterest| Instagram
How to Trim a Whole Brisket
Ingredients
- 1 whole packer brisket, 12 to 16 pounds
Instructions
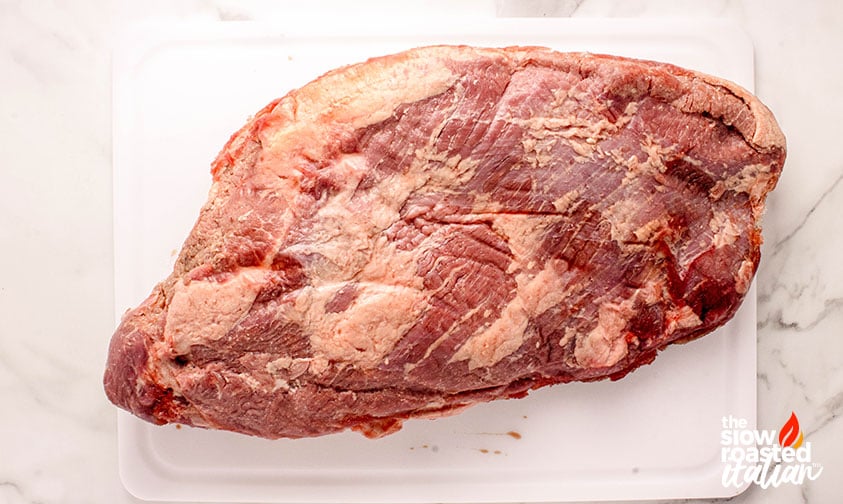
- PREP BRISKET: Remove 1 whole packer brisket, 12 to 16 pounds from packaging and pat dry with paper towels. Place it on a large cutting board with the fat cap facing up.
- FLIP AND LOCATE FAT: Turn the brisket so the meat side is facing up. Locate the hard fat layer between the point and flat. This fat will feel firm and waxy.
- REMOVE HARD FAT: Using a sharp knife, carefully trim away the hard fat layer, removing as much as possible without cutting into the meat.
- TRIM SILVER SKIN: Still working on the meat side, remove any silver skin by sliding the knife just under the membrane and trimming it away in thin strips.
- SHAPE BRISKET: Trim thin edges and ragged pieces from the brisket. Round the corners slightly and remove the small “mohawk” piece from the point so the brisket cooks evenly.
- TRIM FAT CAP: Flip the brisket so the fat cap is facing up. Trim the fat down to an even layer about ¼ inch thick across the entire surface.
- FINAL CHECK: Check that the brisket has an even fat cap, smooth edges, and no large hard fat pockets remaining.
- READY TO COOK: The brisket is now ready for seasoning and cooking.
Donna’s Notes
Nutrition
All nutritional information is based on third party calculations and is only an estimate. Each recipe’s nutritional value will vary depending on the ingredients used, measuring methods, and portion sizes.
Originally published May 2026
Disclosure: Posts may contain affiliate links. If you purchase a product through an affiliate link your price will remain the same and The Slow Roasted Italian will automatically receive a small commission. Thank you for supporting us, it helps us keep creating new recipes.


Welcome!
We’re Donna and Chad, the dream team behind The Slow Roasted Italian. Our focus is on taking complicated OUT of the kitchen. Life is busy enough, making meals should be fast and easy, to help make your life as simple as possible. Read More >>