

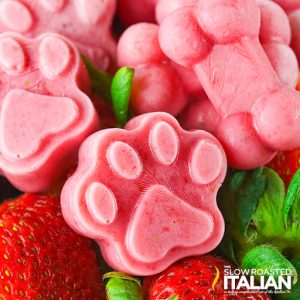
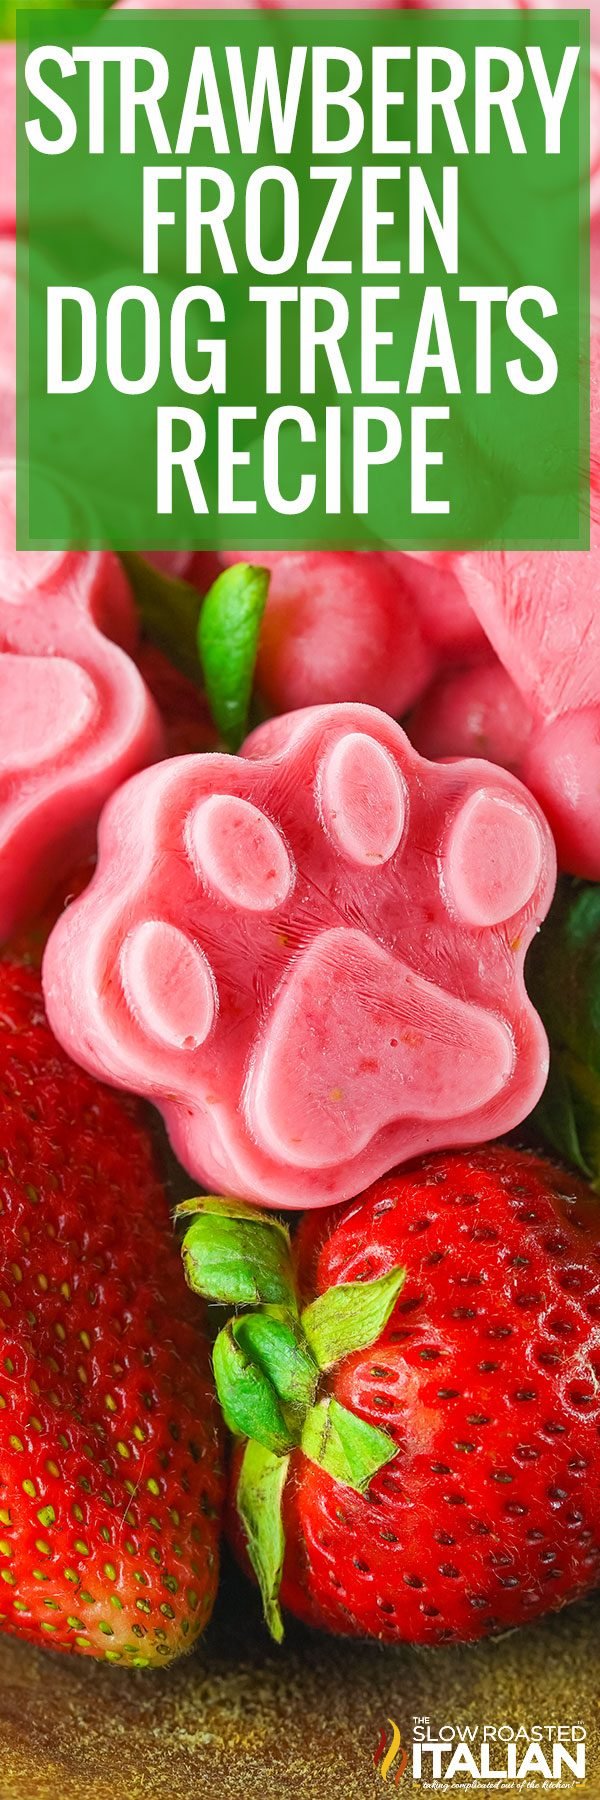
Frozen Strawberry Dog Treats
Make homemade Strawberry Dog Treats with tangy Greek yogurt, fresh summer berries, and a touch of honey. And with the help of a food processor, it’s as easy as 1-2-3! With so many different options to choose from (and so many recalls!), it can be hard to know exactly which snacks are nutritious and safe for your furry friend.

That’s why creating frozen dog treats from scratch is such a great idea. Just real food ingredients and no fillers or junk.
These strawberry treats for dogs are a creamy, wholesome, and pup-approved snack that will cool off your furry friend on a hot day!

Strawberry Dog Treats
Let’s be honest, our four-legged babies deserve treats just as good as ours. Cocoa and Mocha go crazy for these all year long!!!
These frozen strawberry yogurt dog treats are a simple, wholesome way to spoil your pup with ingredients you’d eat yourself.
To be honest, I have popped these in my mouth from time to time. I won’t tell you if you don’t. {wink}
No mystery fillers, no weird preservatives… just real food for your best friend. Bonus? They’re super easy to make and even cuter coming out of paw-print molds!
When it’s extra hot outside, I’ll make a few different flavors at once and toss them all into a big baggie for a flavor surprise.
And if you’re trying to come up with ways to entertain the kiddos during the summer, this is an easy way to get some time in the kitchen!

INGREDIENT NOTES
- Strawberries: Use ripe, fresh berries for the best flavor. The deeper the color, the better! Be sure to trim the stems completely before blending.
I like to use a straw to hull strawberries quickly without losing too much of the fruit. Thaw frozen strawberries first and pat them dry to avoid excess water, which would lead to ice crystals. - Yogurt: Avoid anything with flavors or sweeteners, especially xylitol (it’s toxic to dogs). Plain, unsweetened Greek yogurt is best!
Regular yogurt is fine too, but it doesn’t tend to freeze as well. - Honey: Helps to add a little sweetness, but it’s entirely optional. Always use real honey and not the artificial stuff, but leave it out if your dog is under 1 year old.

VARIATIONS
- Banana-Berry Blend: Replace half of the berries with a ripe banana.
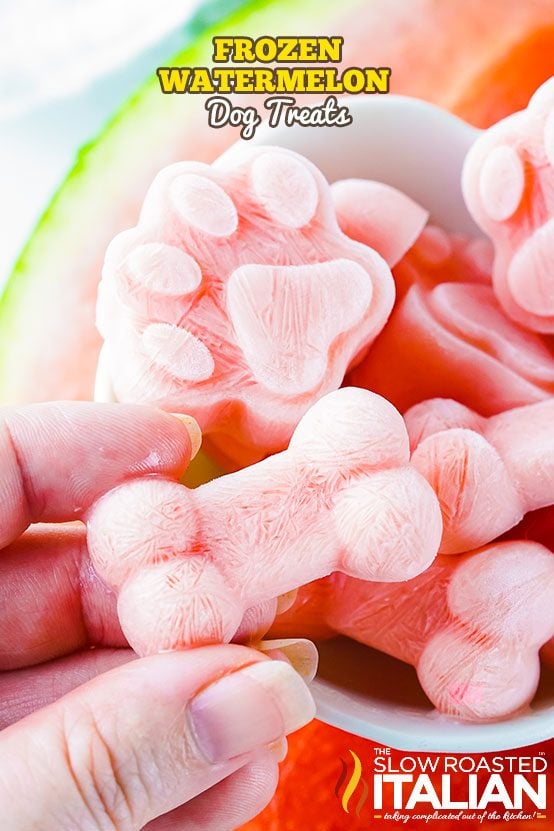
- Melon Mix: Make your dog treats with strawberries and watermelon.
- Bone Broth Boost: Add extra nutrition with 2 tablespoons of unsalted chicken or beef bone broth.
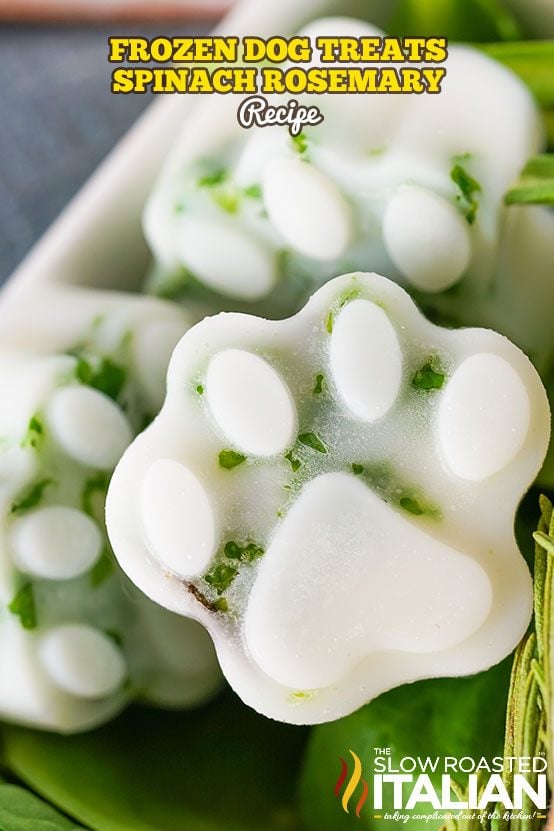
- Minty Fresh: Include a few fresh mint leaves for a (vet-approved) breath-freshening twist.
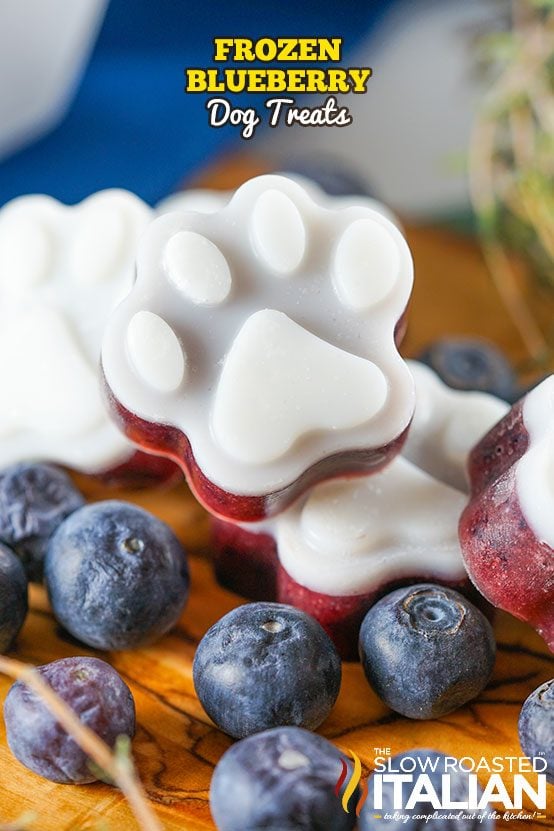
- Blueberry Bliss: Swap the strawberries with blueberries.
STRAWBERRY YOGURT DOG TREATS FAQ
Yes, it is safe for dogs to eat frozen strawberries, and it makes a healthy, natural treat.
Always remove the stems and leaves and wash the fruit thoroughly if you’re freezing it yourself. It can help to cut the berries into smaller pieces or mash them to make chewing easier and prevent choking.
Don’t overdo it, though! There’s a lot of natural sugar and fiber in fruit, which can cause digestive issues in larger amounts.
Avoid the sugary, artificial or synthetic kind, which isn’t healthy for canines. Real honey (especially local varieties) is the best choice for your furry friend.
Sure! Just be sure to swap the strawberries for another dog-safe fruit or vegetable option. Melon, bananas, peaches, and other berries are all great options.
Stick with one per day, maybe two for larger breeds, since these are meant to be a special snack.
Once they’re frozen solid, pop them out of the silicone molds and store in an airtight container or freezer-safe storage bag.
Homemade strawberry treats for dogs will last for up to 2 months in the freezer, so you can spoil them daily throughout the summer!
I’ve made countless homemade dog treats over the years, and this recipe is one of the easiest and most loved by my cavapoos: Cocoa and Mocha!!!
Greek yogurt adds a creamy base that’s great for digestion, while strawberries bring in natural sweetness and vitamin C. A touch of honey rounds it out without overpowering.
The trick is using silicone molds for easy release and freezing them flat so nothing spills. Your pup’s going to flip for these!
DONNA’S PRO TIPS
- Use silicone molds for easy pop-out. No sticking, no mess.
- Freeze flat on a tray or cutting board to keep your treats level while setting.
- Store in small batches in the freezer so you can grab one or two at a time without defrosting the whole lot.
- Make a human-safe version by doubling the recipe, adding a squeeze of lemon, and freezing in ice cube trays for smoothie boosters!
TOOLS NEEDED
- Food Processor for blending everything together
- Silicone Molds: The paw and bone shapes make these homemade treats for dogs a little extra fun!
- Baking Syringe: Since the molds are so small, this is a mess-free solution for the job. If you don’t have any on hand, a Pourable Cup will work too.

Enjoy!
With love, from our simple kitchen to yours.
Don’t miss a thing! Follow us on
Facebook| X | Pinterest| Instagram


Frozen Strawberry Dog Treats
Equipment
Ingredients
- 10 fresh strawberries
- 1/2 cup plain Greek Yogurt
- 2 tablespoons real honey
Instructions
- Prepare the Strawberries: Rinse the strawberries. Slice off the stems and cut each berry in half.
- Blend the Ingredients: Add 10 fresh strawberries, 1/2 cup plain Greek Yogurt, and 2 tablespoons real honey to a food processor or blender. Blend until smooth, scraping down the sides as needed.
- Fill the Molds: Place silicone molds on a flat, moveable surface like a cutting board or small baking sheet. Pour the mixture into each cavity, filling to the brim.
- Freeze: Carefully transfer molds to the freezer. Freeze for at least 3 hours, or until completely solid.
- Serve: Pop out the treats and serve frozen. Store any extras in a freezer-safe container or resealable bag.
Donna’s Notes
Freezing: Best served straight from the freezer. No thawing needed dogs love the texture! Customization Ideas: Swap strawberries for blueberries or bananas. Just make sure your ingredients are safe for dogs. Ingredient Reminder: Always double-check that your yogurt and peanut butter (if using) contain no xylitol: a sweetener that is toxic to dogs.
Nutrition
All nutritional information is based on third party calculations and is only an estimate. Each recipe’s nutritional value will vary depending on the ingredients used, measuring methods, and portion sizes.
Originally published July 2021, updated and republished August 2025
Disclosure: Posts may contain affiliate links. If you purchase a product through an affiliate link your price will remain the same and The Slow Roasted Italian will automatically receive a small commission. Thank you for supporting us, it helps us keep creating new recipes.


Welcome!
We’re Donna and Chad, the dream team behind The Slow Roasted Italian. Our focus is on taking complicated OUT of the kitchen. Life is busy enough, making meals should be fast and easy, to help make your life as simple as possible. Read More >>


This looks soooo yummy! I’m glad I found this recipe. Can’t wait to make it.
My dogs absolutely love these during the summer. Strawberry is one of their favorites
I love how simple this recipe is! My dog couldn’t get enough of these strawberry frozen treats.
Hi Frankie!
I’m glad you enjoyed the recipe!!
TSRI Team Member,
Devlyn