
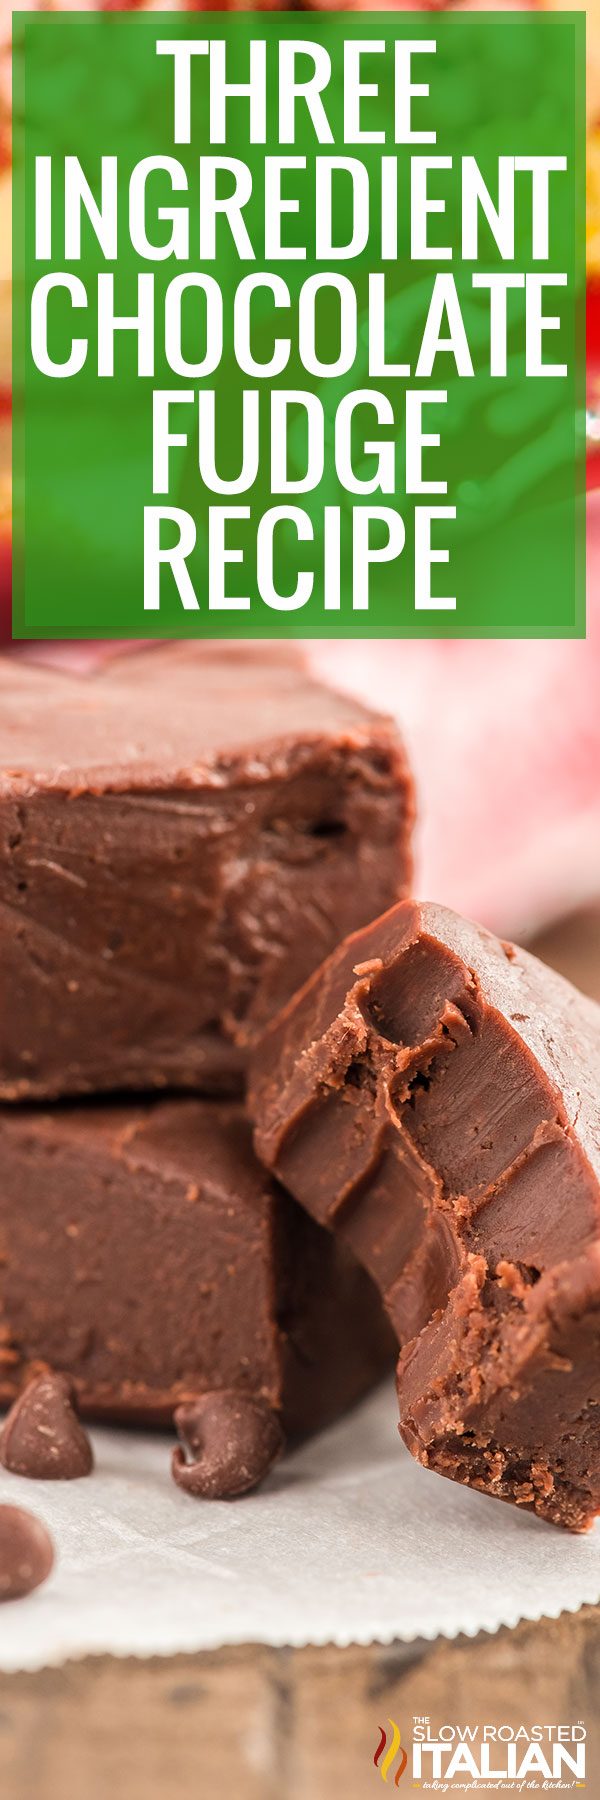
3 Ingredient Chocolate Fudge Recipe
This post may contain affiliate links. Please read my disclosure policy.
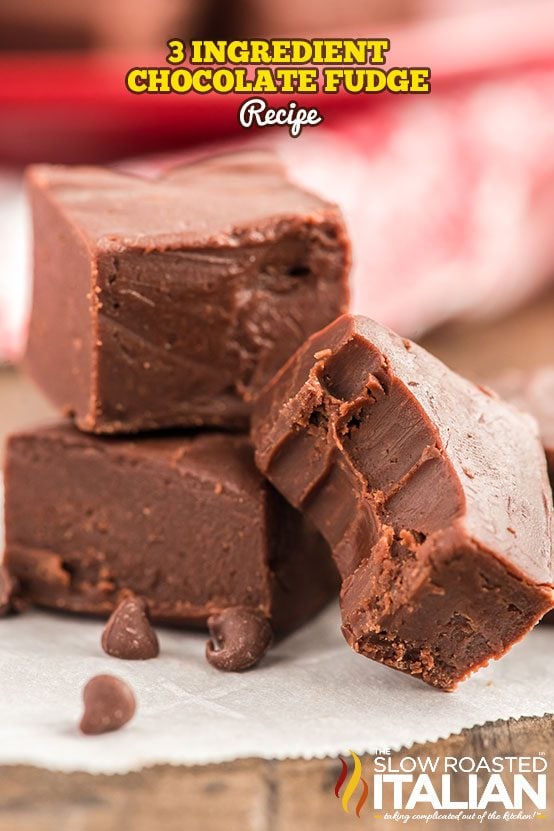
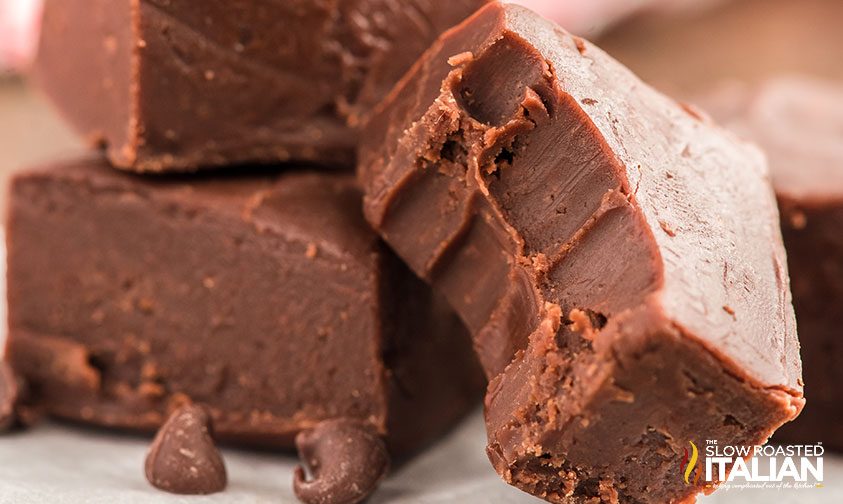
This Chocolate Fudge Recipe uses condensed milk for an easy creamy, delicious treat. Make a batch of this 3 ingredient fudge for the holidays!
Chocolate Fudge Recipe
Traditional fudge can be tricky to make, especially when trying to get all of the cooling and heating temperatures just right.
This recipe for chocolate fudge takes all the guesswork out of it, and it’s such a quick and easy treat to make.
Homemade candies like fudge and toffee are delicious, and they are great holiday gifts, too!
Pair this three ingredient fudge with my Reese’s Peanut Butter Fudge — it has the perfect balance of creamy and crunchy with chunks of peanuts throughout.
My Oreo Fudge recipe is a unique and delicious spin on the classic fudge but with that special oreo flavor and white chocolate goodness!
Or, try my recipe for Peanut Butter Fudge without condensed milk! It’s incredibly easy to make and comes together in just 10 minutes.
Ingredient Notes and Substitutions
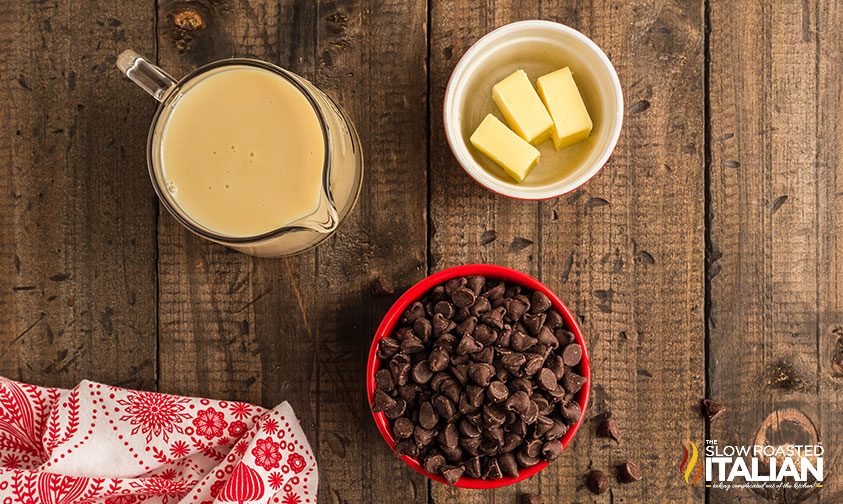
- Sweetened Condensed Milk – Pay close attention to the size of the can, especially if you’ll be using a substitute.
If your ratio of milk to morsels is off, then 3 ingredient chocolate fudge won’t set up properly. - Chocolate Chips – Semi-sweet morsels are my top choice for any chocolate fudge recipe, but you can use milk chocolate, dark chocolate, or even white chocolate if you prefer.
Or, use half semi-sweet and half of another kind to create just the right flavor balance. - Salted Butter – This keeps the mixture silky smooth, and the added salt enhances the flavors while balancing the sweetness.
If unsalted is all you have on hand, don’t worry about adding any salt.
Tips for Making 3 Ingredient Fudge
This is such an easy chocolate fudge recipe to make. Just melt everything together in the microwave, then pour into a pan and refrigerate until firm!
Here are a few tips for success:
- Let it set completely. I recommend letting 3 ingredient chocolate fudge cool for at least 8 hours or even overnight. This helps it set to a firm consistency.
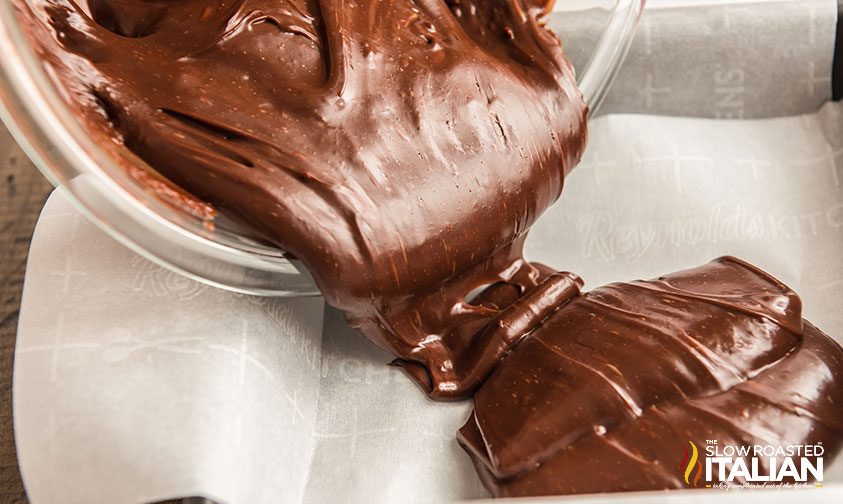
- Tip for easy removal: Lining your pan with parchment lets you lift the entire slab out for easier cutting. Plus, you won’t need to wash your pan afterward!
- Keep it cold. This is a soft fudge, so it requires refrigeration to stay firm. If you leave it out for a long period of time, it will likely become very soft and gooey.
- Check your microwave wattage. The microwave used for this recipe is a 1000W household microwave.
If you have a more powerful microwave, you will need to use less time and/or power to heat your ingredients.
Kitchen Tools You Will Need
- 8×8 Baking Pan – This pan comes with a lid for easier storage.
- Microwave-Safe Bowl – Not only does it make melting chocolate easier, but you can use it to quickly steam vegetables too!
- Silicone Spatula – Withstands the heat and makes it easy to scrape off the chocolate after mixing.
- Parchment Paper – Prevents your dessert from sticking and makes cleanup a breeze!
Adding Mix-Ins to this Recipe for Chocolate Fudge
This makes a great base for a variety of flavor combinations, and the possibilities are endless!
Add your mix-ins after the chocolate mixture is melted, or sprinkle them over the top before placing the pan in the refrigerator.
- Chopped nuts
- Sprinkles
- Crushed cookies or pretzels
- Mini marshmallows
- Candy pieces
- Sea salt or coconut flakes
- Dried fruit
Storing and Freezing Three Ingredient Fudge
Keep homemade fudge in a sealed container in the refrigerator for around 7 days.
Since this chocolate fudge recipe is made with condensed milk, it’s safe to freeze as well. Just wrap it tightly in plastic wrap, then place it into a large storage bag.
Freeze individual pieces for a quick treat, or defrost the entire pan in the refrigerator before serving.
Chocolate Fudge Recipe FAQ
This often happens when the condensed milk and chocolate chip mixture isn’t hot enough to start. Everything must be completely melted before it is transferred to the pan to cool.
Heat in 30-second bursts in the microwave, stirring well between each to ensure everything is melting evenly.
Continue until the mixture is completely smooth on your last stir.
Sure! Any size pan will work just fine. Keep in mind that using a larger pan will result in thinner pieces, and there won’t be enough to spread all the way to the edges.
However, you can easily make a double batch of this recipe for chocolate fudge and use a 9×13 pan for that!
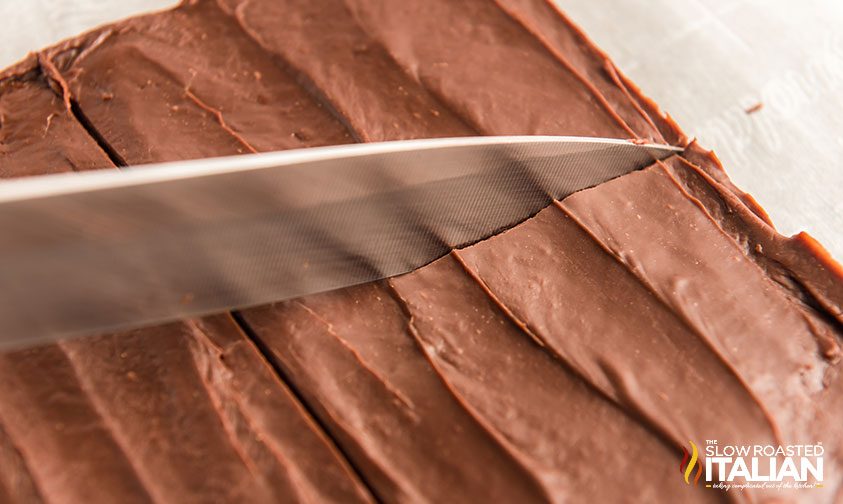
A hot, sharp knife is the easiest way to get clean edges. Dip a large knife in boiling water, dry it completely, then press down in one smooth motion.
The metal will retain the heat from the water without affecting the overall texture of the dessert.
Some people recommend using dental floss, but if you do, make sure to use one that isn’t flavored!
Enjoy!
With love, from our simple kitchen to yours.
Don’t miss a thing! Follow us on
Facebook | Twitter | Pinterest | Instagram
Other Easy 3 Ingredient Recipes


3 Ingredient Chocolate Fudge Recipe
Ingredients
- 12 ounces semi-sweet chocolate chips, 1 12-ounce bag, (2 cups)
- 14 ounces sweetened condensed milk, 1 14-ounce can
- 3 tablespoons salted butter
Instructions
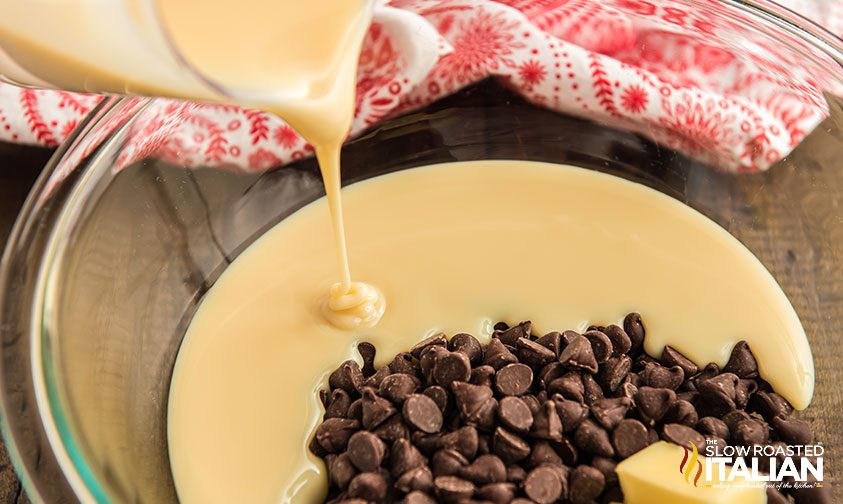
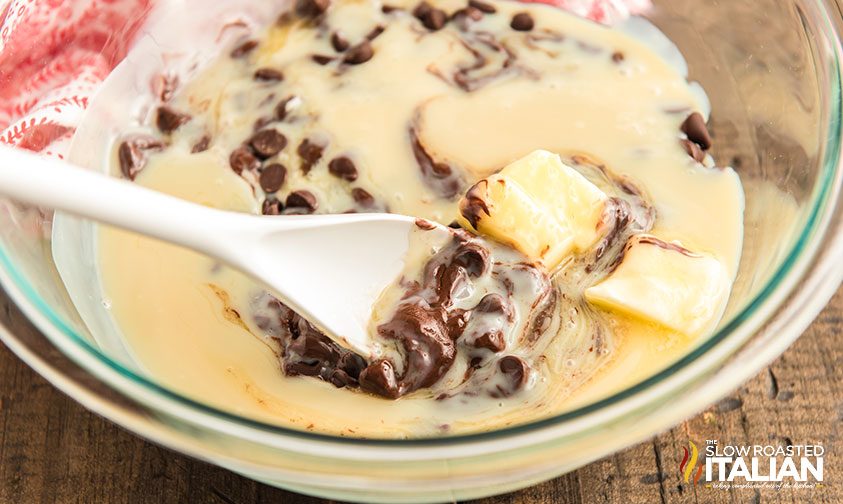
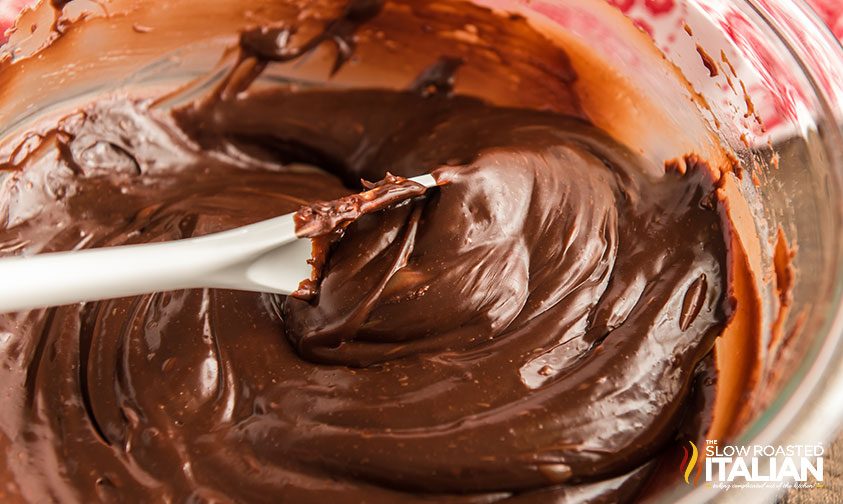
- In a medium glass bowl (microwave safe), place all ingredients. Microwave on high for 1 minute.
- Carefully remove the bowl (touching the sides only, not the bottom) and stir to combine. Reheat in 30 second intervals until all ingredients are melted and easily combined. (Should be about 3 minutes of total heat time)
- Cut a piece of parchment paper and line it inside an 8×8” pan. Pour melted chocolate mixture into the pan. Allow to cool completely, and then refrigerate until fudge becomes firm.
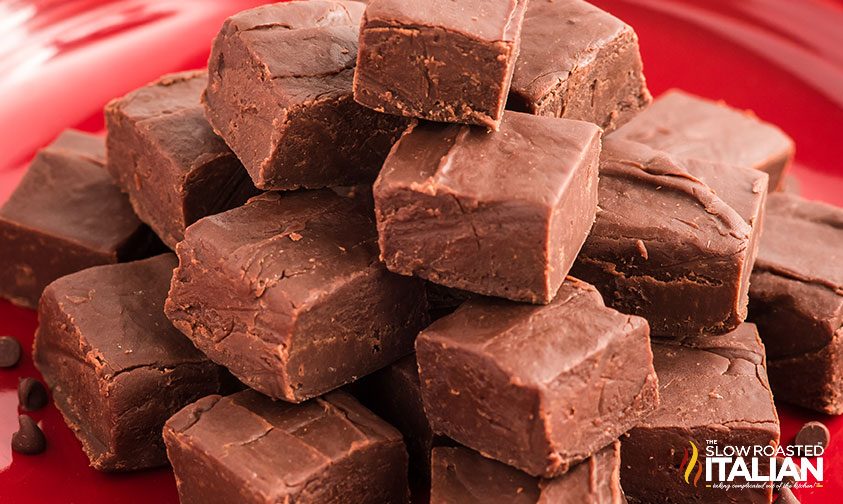
- Once your fudge is set, you can pull the entire pan of fudge out by pulling on the parchment paper. Cut your fudge into squares and serve immediately.
Donna’s Notes
Nutrition
All nutritional information is based on third party calculations and is only an estimate. Each recipe’s nutritional value will vary depending on the ingredients used, measuring methods, and portion sizes.
Originally published November 2020, updated and republished November 2023
Disclosure: Posts may contain affiliate links. If you purchase a product through an affiliate link your price will remain the same and The Slow Roasted Italian will automatically receive a small commission. Thank you for supporting us, it helps us keep creating new recipes.

i dont have a microwave. how to make this without a microwave?
A stove & sauce pan. It is just being melted, then combined to the other ingredients. You boil water in a pot. Use the heat from water to melt ingredients in a separate pot placed over it so they do not touch. Or google/ u tube video on how to properly melt ingredients without using a microwave. This is how it was done BEFORE we had microwave technology.
can I bake it in the oven?
Why only 7 days if kept in the fridge
My guess would be is that it starts to break down. Being only 3 ingredients, nothing to bind.
Besides, it’s fudge. How is it not being consumed in a day or two?
Or in one sitting?!?! 🤤😋
So easy to make and no fussing with the stove, my kinda fudge! It is so yummy!
I’ve seen in other recipes by adding an extra quarter cup of chocolate chips. You may be able to leave this fudge at room temperature for a bit. Has anyone tried this?
I’ve always made this with 1 1/2 pkgs. chocolate chips. No need to store in the refrigerator.
Right?! 🤣🤣🤣