

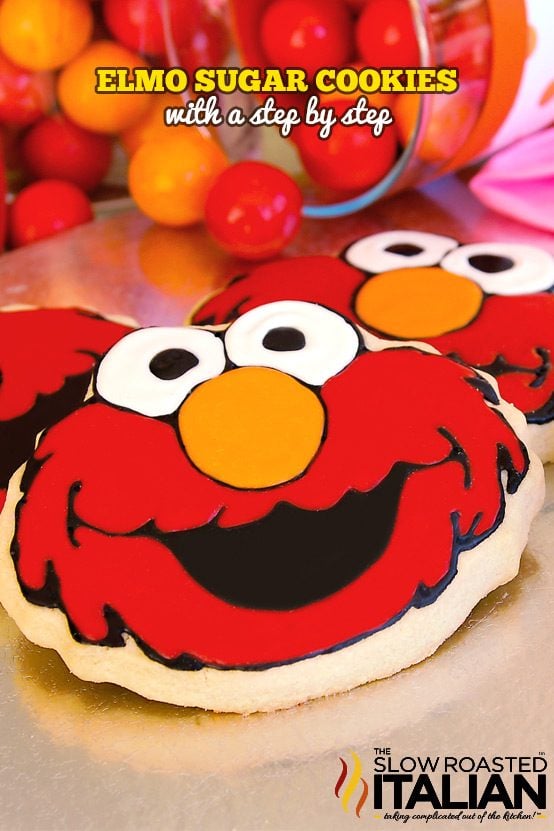
Elmo Sugar Cookies
Elmo Sugar Cookies are perfect for kids parties, holiday favors and anytime fun. Get them just right can be tricky. With this simple step-by-step ‘How to Decorate Elmo Cookies’ Tutorial you will knock them out in no time at all.
We are spending a fantastically fun week sharing Munchkin’s Elmo Themed 2nd Birthday Party with you. Monday, we shared Rubber Ducky Punch with you. Yesterday we shared the amazing Chocolate Covered Marshmallow Pops with you and today, I bring you another favorite from the dessert table.
SCROLL DOWN FOR TUTORIAL AND SUPPLY LIST
When we decided to have an Elmo themed party, I knew I had to make a fabulous Elmo cookie. I am known for my cookies, they are the most requested item that I make. So, when I bought the Elmo Cookie Cutter I started messing around with decorating and found a most simple way to get a fabulous cookie. You can also use a round cookie cutter and draw the face in the middle with the instructions below. Here is the #2 Cookie Cutter for those who have asked.
It’s especially developed to hold its shape when baked. I make my sugar cookie dough the day before and chill it overnight before I roll it out.
Then to really get the cut cookie to hold its shape you can chill it for a few hours on the cookie sheet before baking but this is not completely necessary.
THE ICING – Now icing is a whole different ball game. My all time favorite is our Best Tasting Sugar Cookie Icing. It dries hard and tastes ahhh-mazing!
Get Free Recipes Sent to Your Email
Do you ❤️ TSRI? Don’t miss another recipe!
Subscribe to The Slow Roasted Italian by email to receive new recipes in your inbox!!
Elmo Cookie Frosting
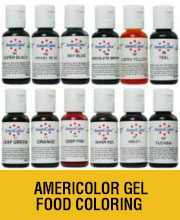
Separate your icing into 4 bowls. Portion out in this manner: about 1/2 of your mix in the first bowl, 1/4 in the next and the last two get about 1/8. Color the first bowl red, the second black and the third orange and leave the last white. Be careful to keep bowls covered with plastic wrap or icing will start to crust over and harden.
The bowls of black icing will need to be split in half and one should be thinned to flood consistency. The bowl of red icing will need to be slightly thinned to a flood consistency, as will the white and orange icing. Add 1/8 teaspoon of warm water at a time until it is thinned to a flood consistency. (Flood is thinned enough for two lines to spread into one, without being watery).
Fill squeeze bottles with each icing. You will need 5 bottles. I really like the Kuhn Rikon Decorating Squeeze Bottle. You can use whatever tips on them that you like so you are not stuck with whatever comes out (like on a standard squeeze bottle). Also, they contain the icing well (in a stand up container) and clean up easy.
Once your cookies are completely cooled, and you are ready to start decorating…
Enjoy!
With love, from our simple kitchen to yours.
Don’t miss a thing! Follow us on
Facebook | Twitter | Pinterest | Instagram
SUPPLY LIST AT THE BOTTOM
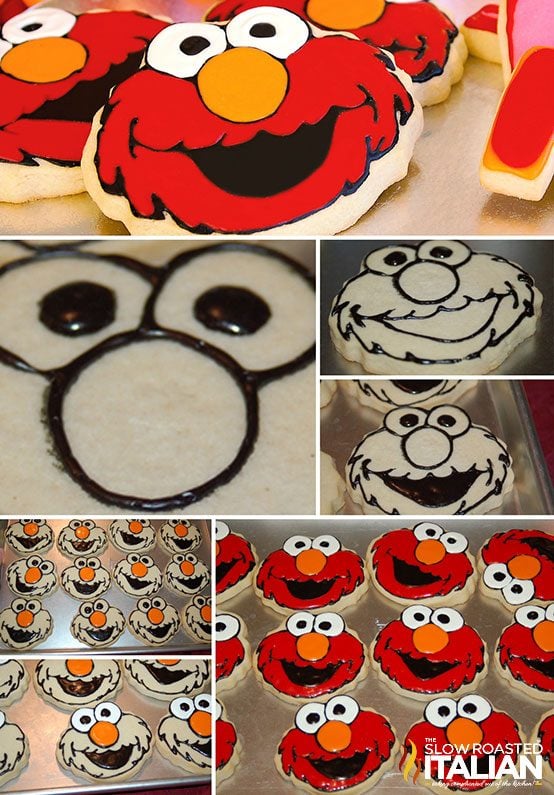
I prefer to lay out 12 cookies on a cookie sheet and decorate them all at the same time. I take each step on all the cookies, and then the next and the next. That when you get the hang of it and are not trying to remember how you got the eyes to look like that again later.
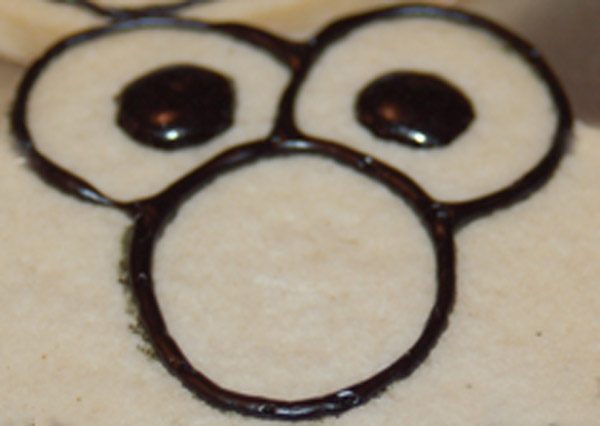
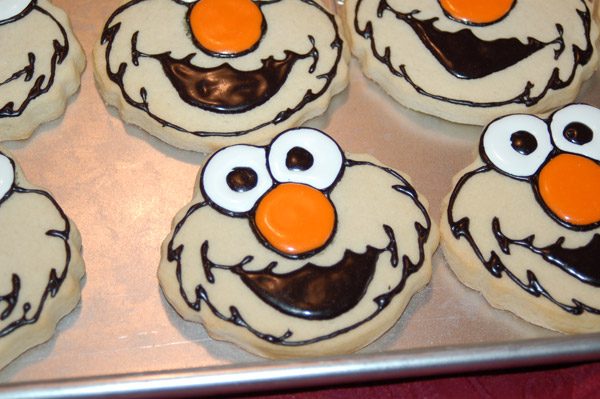
Start with your Elmo shaped cookies facing you. Find the top of the cookie, in between the eyes. Follow this down 1/2″. This is where you will make an oval with your black for the nose. Starting at the top right of the nose form a circle. Then make a circle for the other eye. In the center of the eye make a solid circle about 1/2″ around (use your best judgment).
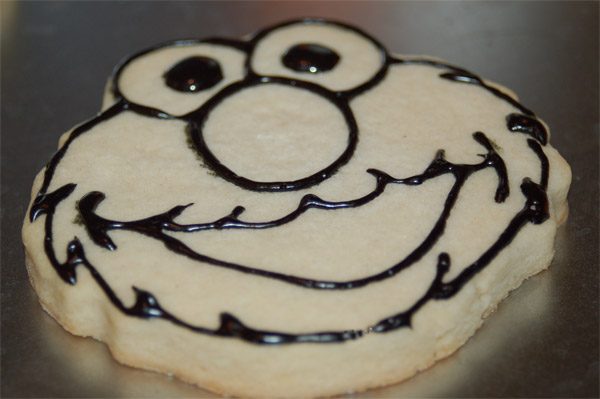
Next, using your black icing with a #2 tip you are going to create the face outline. Starting at top of the cookie next to the eye you will start your out line. Start making an oval and about an inch down you will zig zag in and out to make fur. Do this around the cookie.
The mouth starts with parenthesis at each side of the cookie, on the outer edge near the fur even with the bottom of the nose. Connect your parenthesis with a elongated ‘U’ to make the lower lip. The top lip will have two zig zags on each side on the center point as you see below.
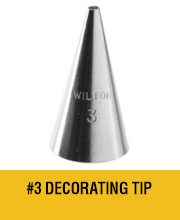
Using a #3 tip on the orange icing (flood consistency) fill in Elmo’s nose.
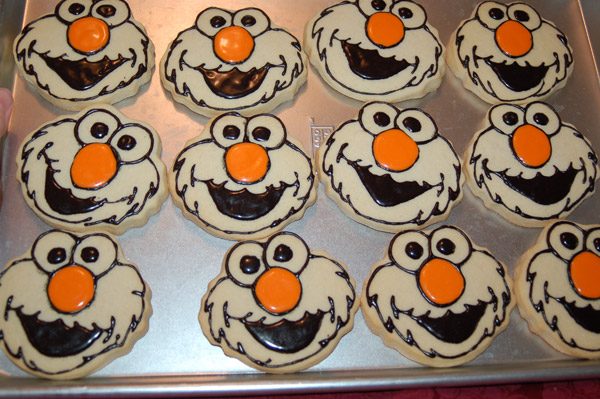
Using a #3 tip and white icing (flood consistency) fill the eye balls, be careful not to fill over the black.
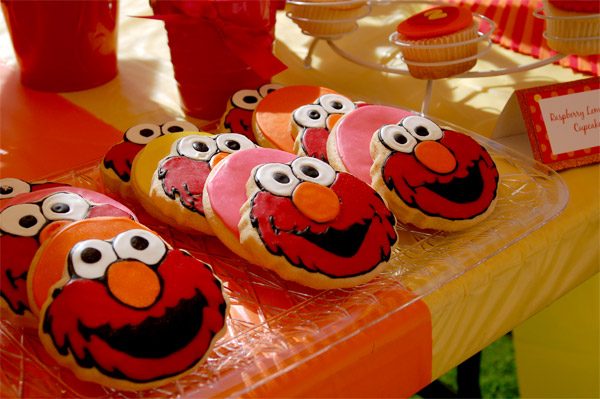
Using your red icing and a #3 tip (flood consistency) flood the face of the cookie with red. Use a toothpick or the tip of your bottle to move the icing. I found it easiest to work from one side to the other.

We served these on adorable clear trays at the party with polka dot cookies in party colors between the Elmo cookies to give it more flair and contrast. They looked amazing!!!
I hope you enjoyed this Elmo sugar cookies post and will continue checking back this week for more party posts!
Supplies List
CLICKABLE SUPPLY LIST – click on the supply list image and the link will open in a new tab.
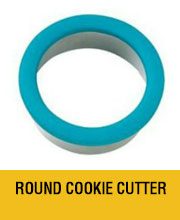


Elmo Cookie Cutter or a round cookie cutter
Kuhn Rikon Decorating Squeeze Bottle
Americolor Gel Food Coloring – need Super Red, Super Black, Orange
Americolor White Food Coloring
Baking Sheets (Jelly Roll Pans)
Tutorial developed by Donna Elick – The Slow Roasted Italian
Copyright ©2012 The Slow Roasted Italian – All rights reserved.
Disclosure: Posts may contain affiliate links. If you purchase a product through an affiliate link your price will remain the same and The Slow Roasted Italian will automatically receive a small commission. Thank you for supporting us, it helps us keep creating new recipes.

Welcome!
We’re Donna and Chad, the dream team behind The Slow Roasted Italian. Our focus is on taking complicated OUT of the kitchen. Life is busy enough, making meals should be fast and easy, to help make your life as simple as possible. Read More >>


Those are just too cute!!!
elmo cookies look cute
These were adorable. I enjoyed watching the birthday girl's grins as she saw Elmo everywhere.
Your Elmos are just adorable! I love the cookies- your whole party theme was so cute. I know your Munchkin enjoyed it. 🙂
Wow, I thought these were printer paper transfers. Thanks for the step-by-step!
You rock. Those are amazing!
good
So beautiful…….. Thanks a lot..